Migrating from Webflow to WordPress isn't complicated, but it does require getting each step right from the beginning. Small oversights in content transfer, URL structure, or design rebuilding might not surface immediately. They tend to show up after launch in the form of broken pages, lost rankings, or a site that just doesn't behave the way it should.
That's why having a clear, structured process matters. This guide walks you through the entire migration workflow: properly exporting your Webflow content, rebuilding your layout in WordPress, and making sure every page works as expected before you go live.
Key Takeaways:
Migrating from Webflow to WordPress works best when you follow a structured process and avoid skipping steps. The key is not to rush the export or conversion, since most issues stem from missed configurations early on. When your setup is done properly, your design, content, and functionality can carry over without needing to rebuild everything manually. Taking the time to test and review each stage helps ensure your site runs smoothly once it goes live.
Understand What Will and Won’t Transfer
Migrating from Webflow to WordPress starts with understanding how the two platforms handle websites differently. Webflow allows you to export front-end code, while WordPress works through themes and dynamic content.
This means your written content and images can move over, but your layout and styling will not carry across automatically. Interactive elements and custom animations usually need to be rebuilt. Having clarity here keeps the process straightforward and avoids wasted effort later.
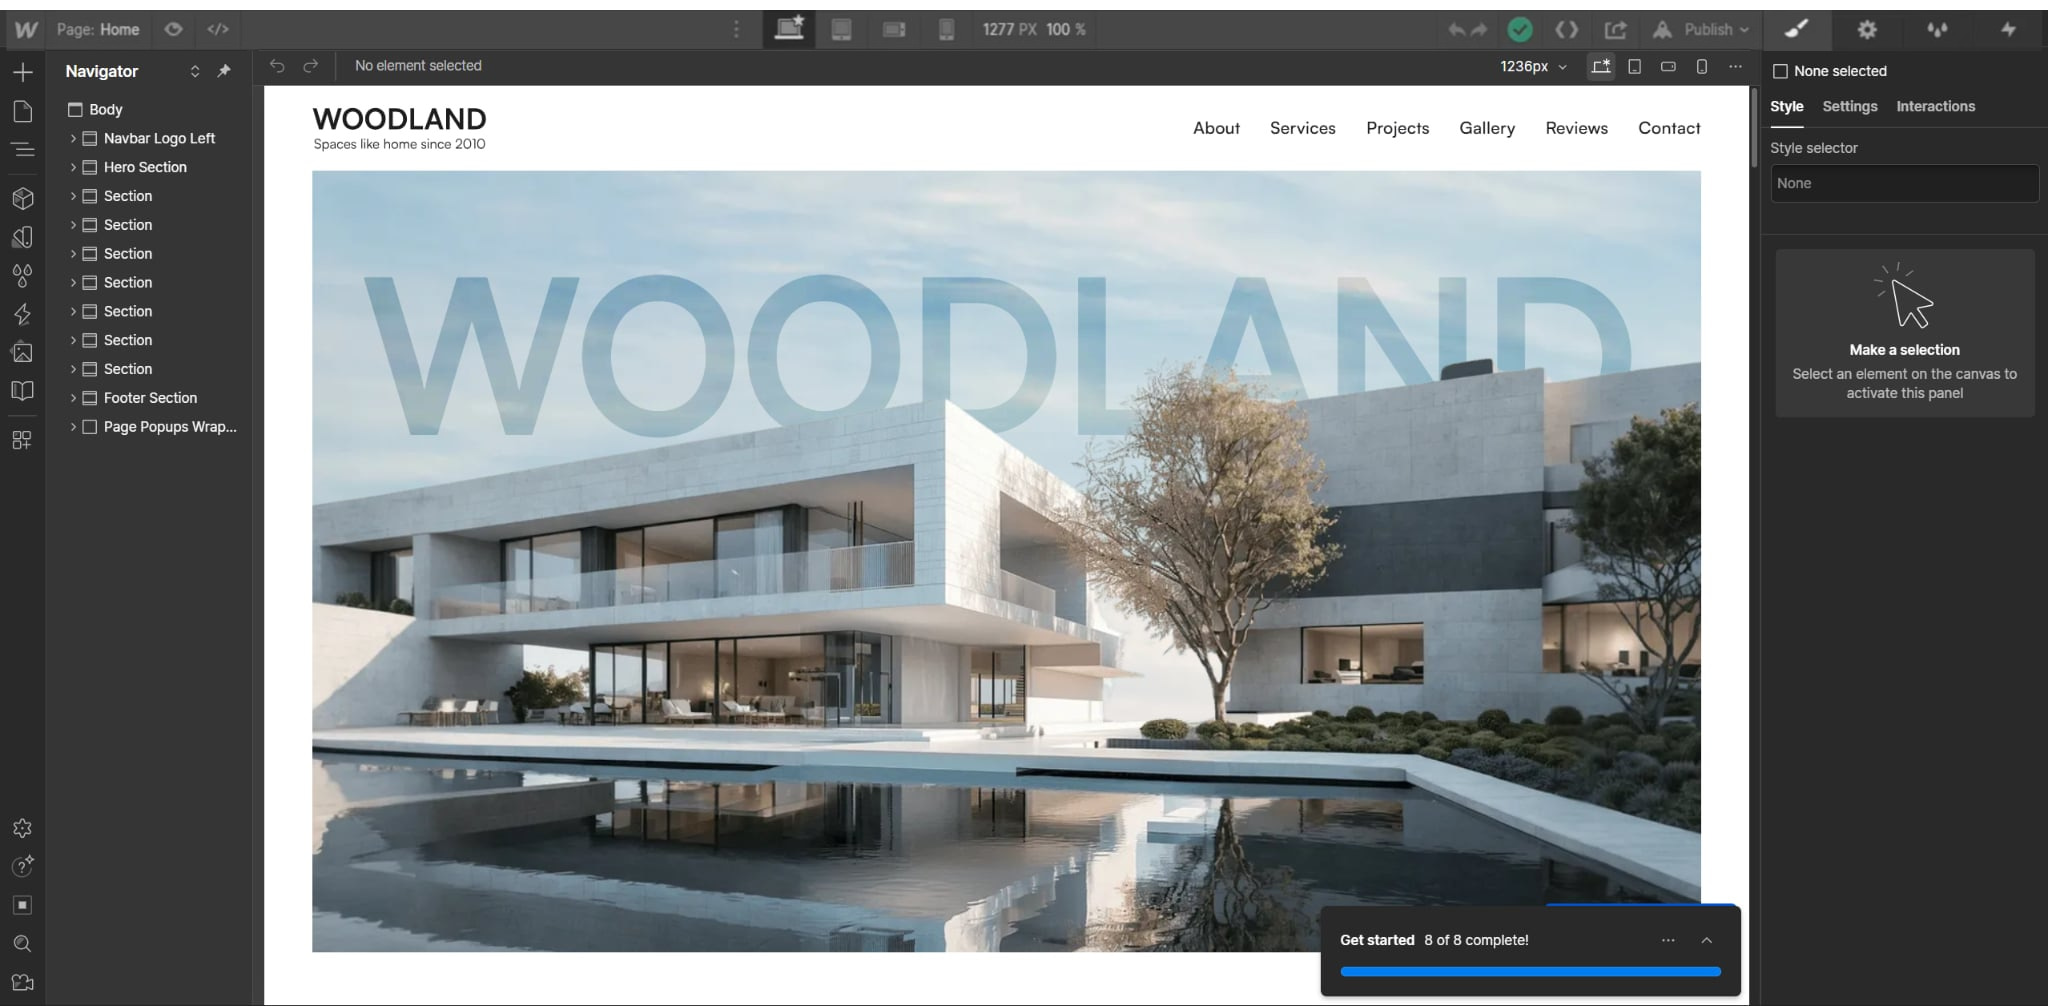
Step 1: Prepare Your Webflow Project
Before starting the conversion, your Webflow project needs to be fully completed. All pages, layouts, and CMS content should already be finalized. Any changes made after exporting will require repeating the process. Publishing your project ensures everything is working correctly before export. This step sets a stable starting point for the conversion.
Step 2: Install Udesly Adapter in Webflow
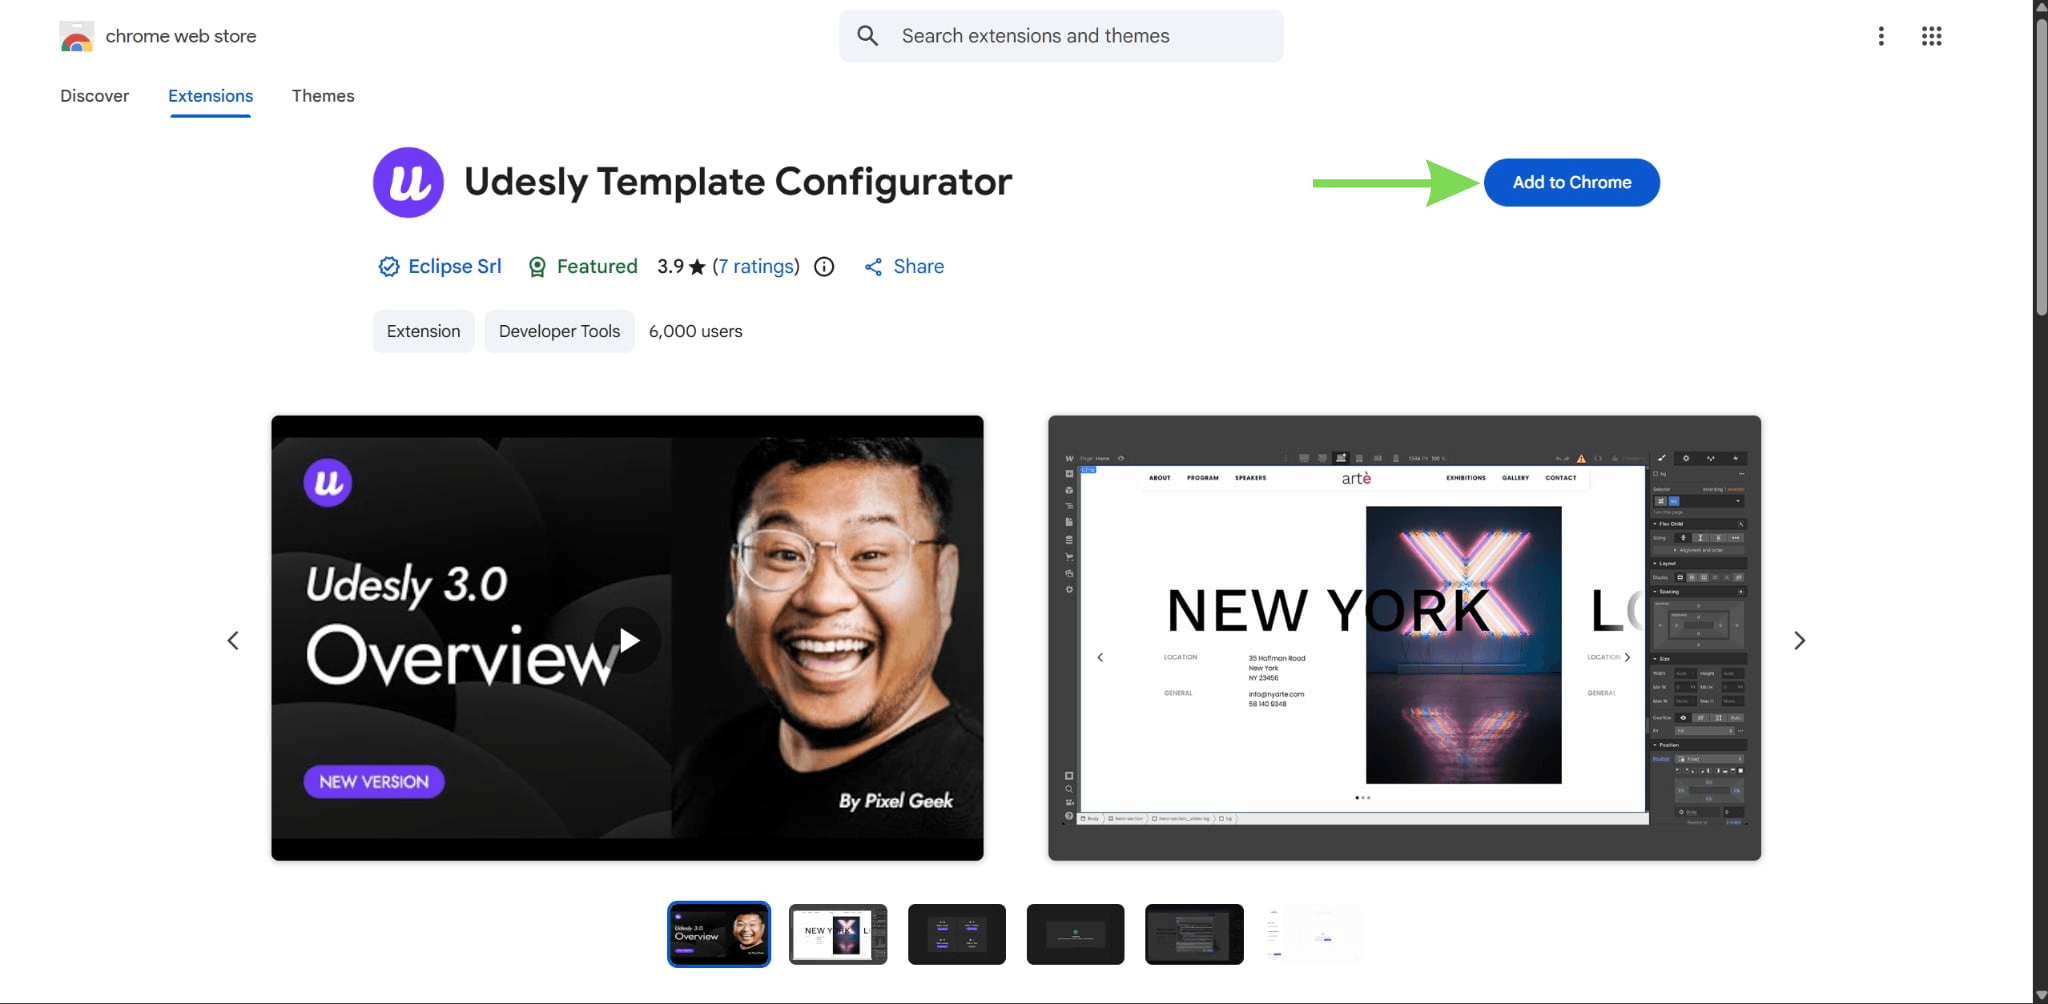
To convert your design into a WordPress theme, you need to install the Udesly adapter inside Webflow. Go to the Chrome Web Store, search for “Udesly Template Configurator,” and add it to Chrome, then open it within Webflow.
This tool prepares your project for export in a format that WordPress can understand. Without this step, the exported files will not function correctly as a theme. It acts as a bridge between the two platforms. This step enables proper conversion.
Step 3: Apply Udesly Attributes
Once the adapter is installed, open your browser extensions.
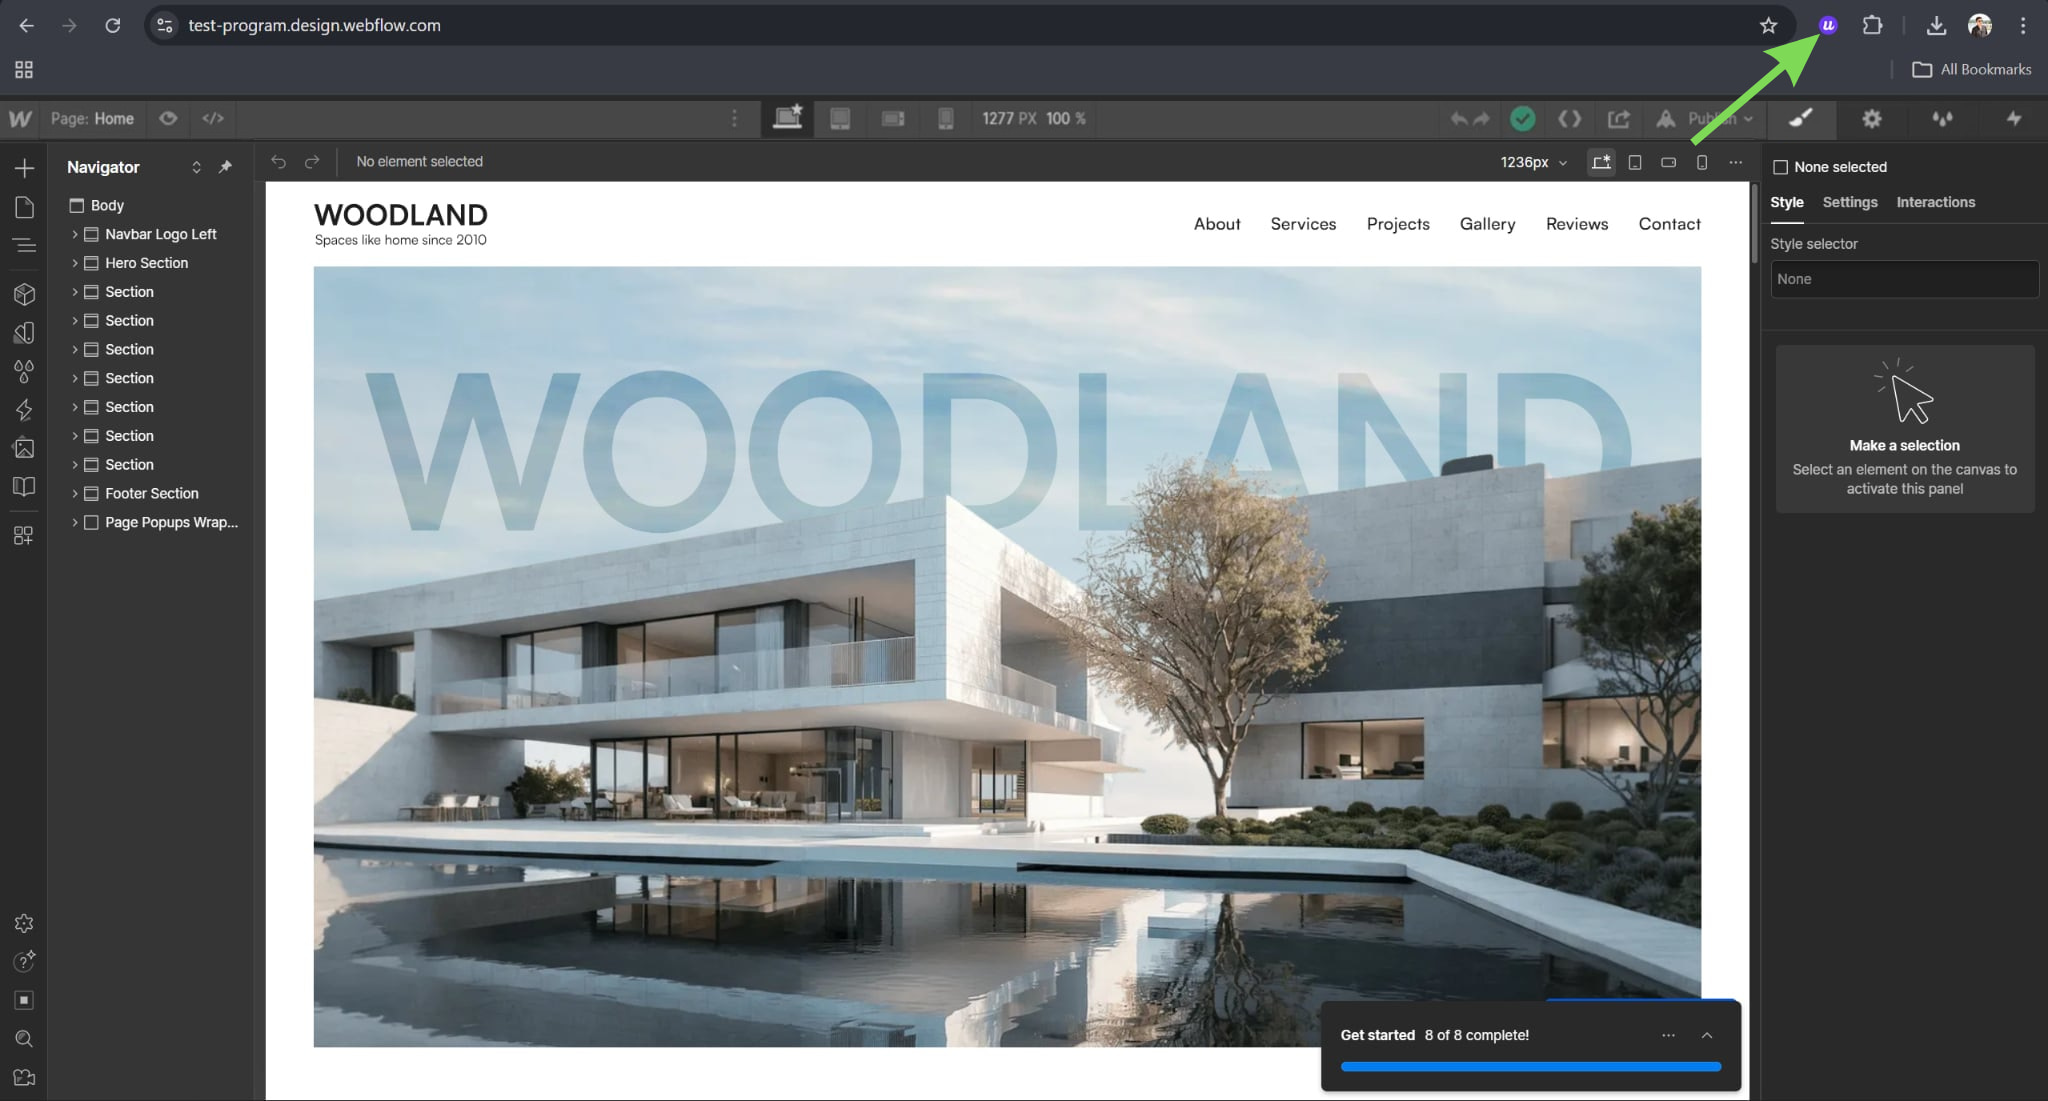
Click the Udesly extension and choose Webflow to WordPress to download the attributes.
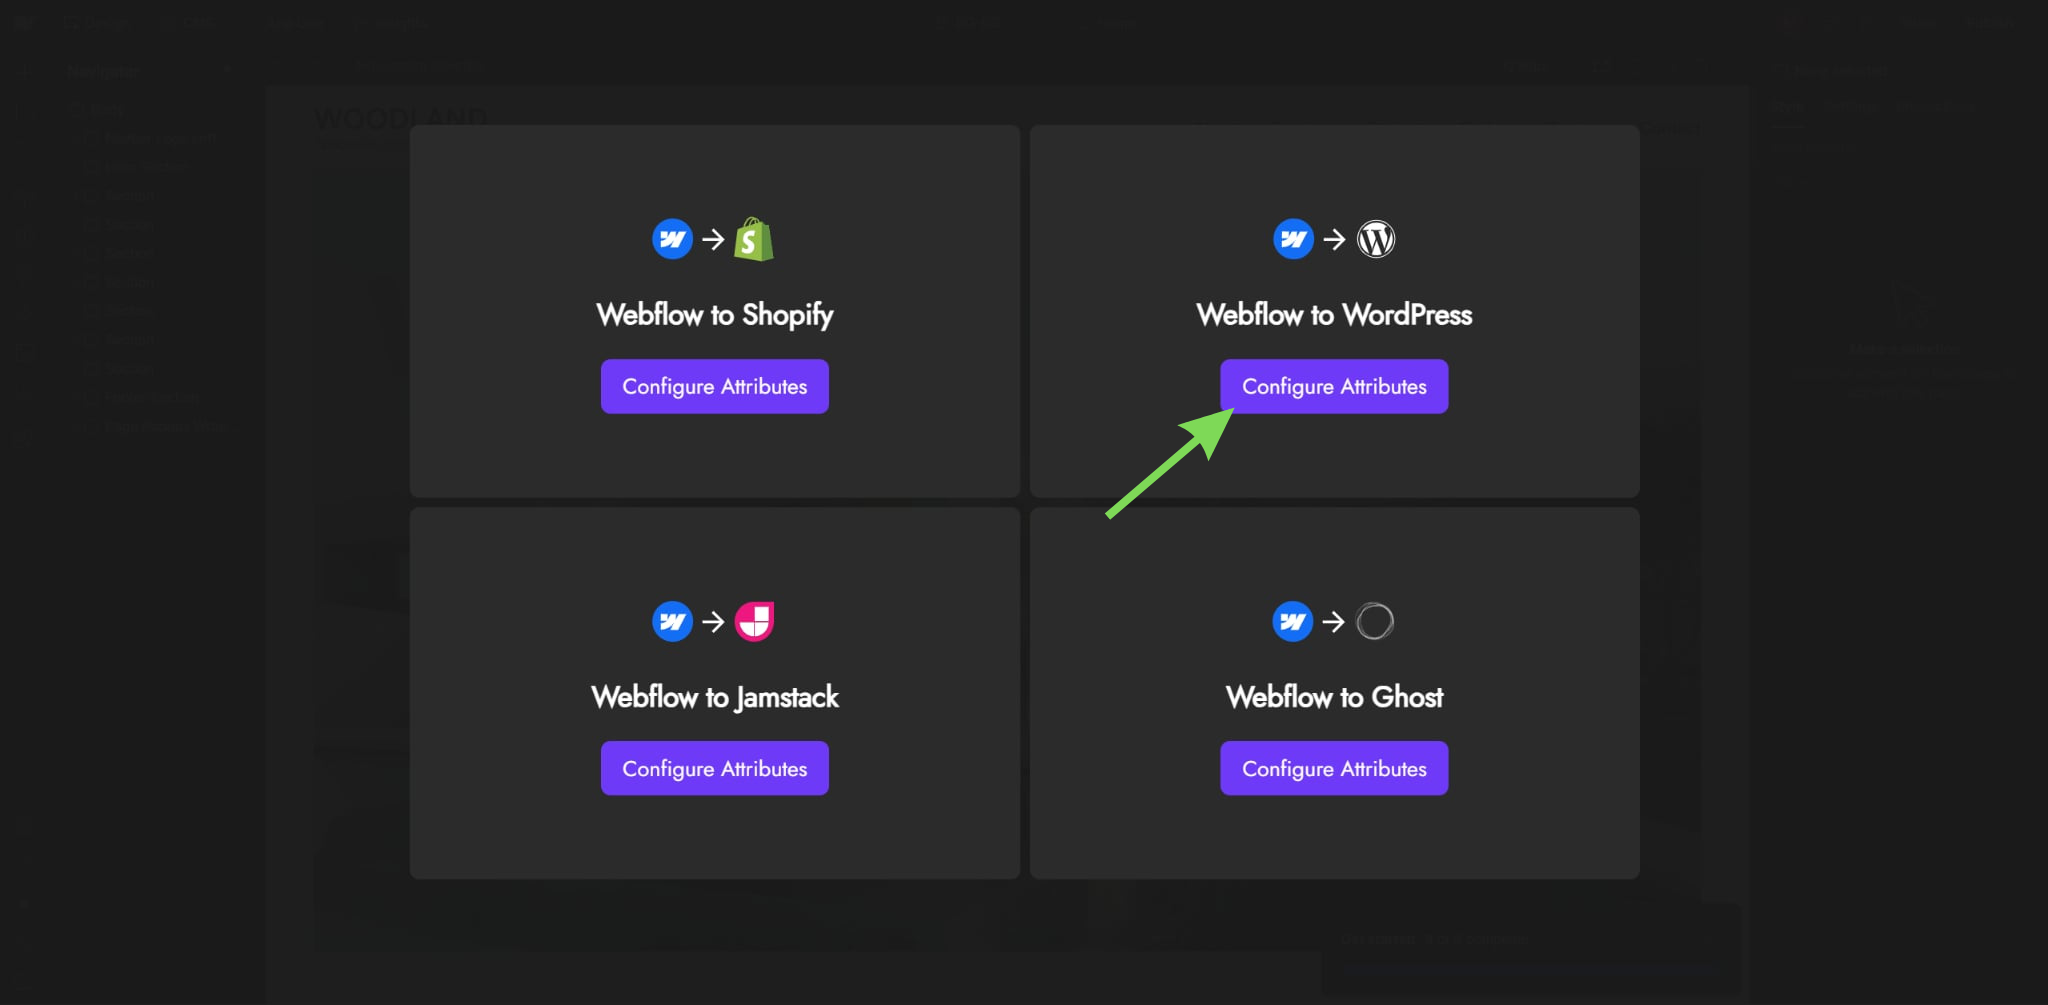
After downloading and applying the attributes, you can open the Udesly app to convert.
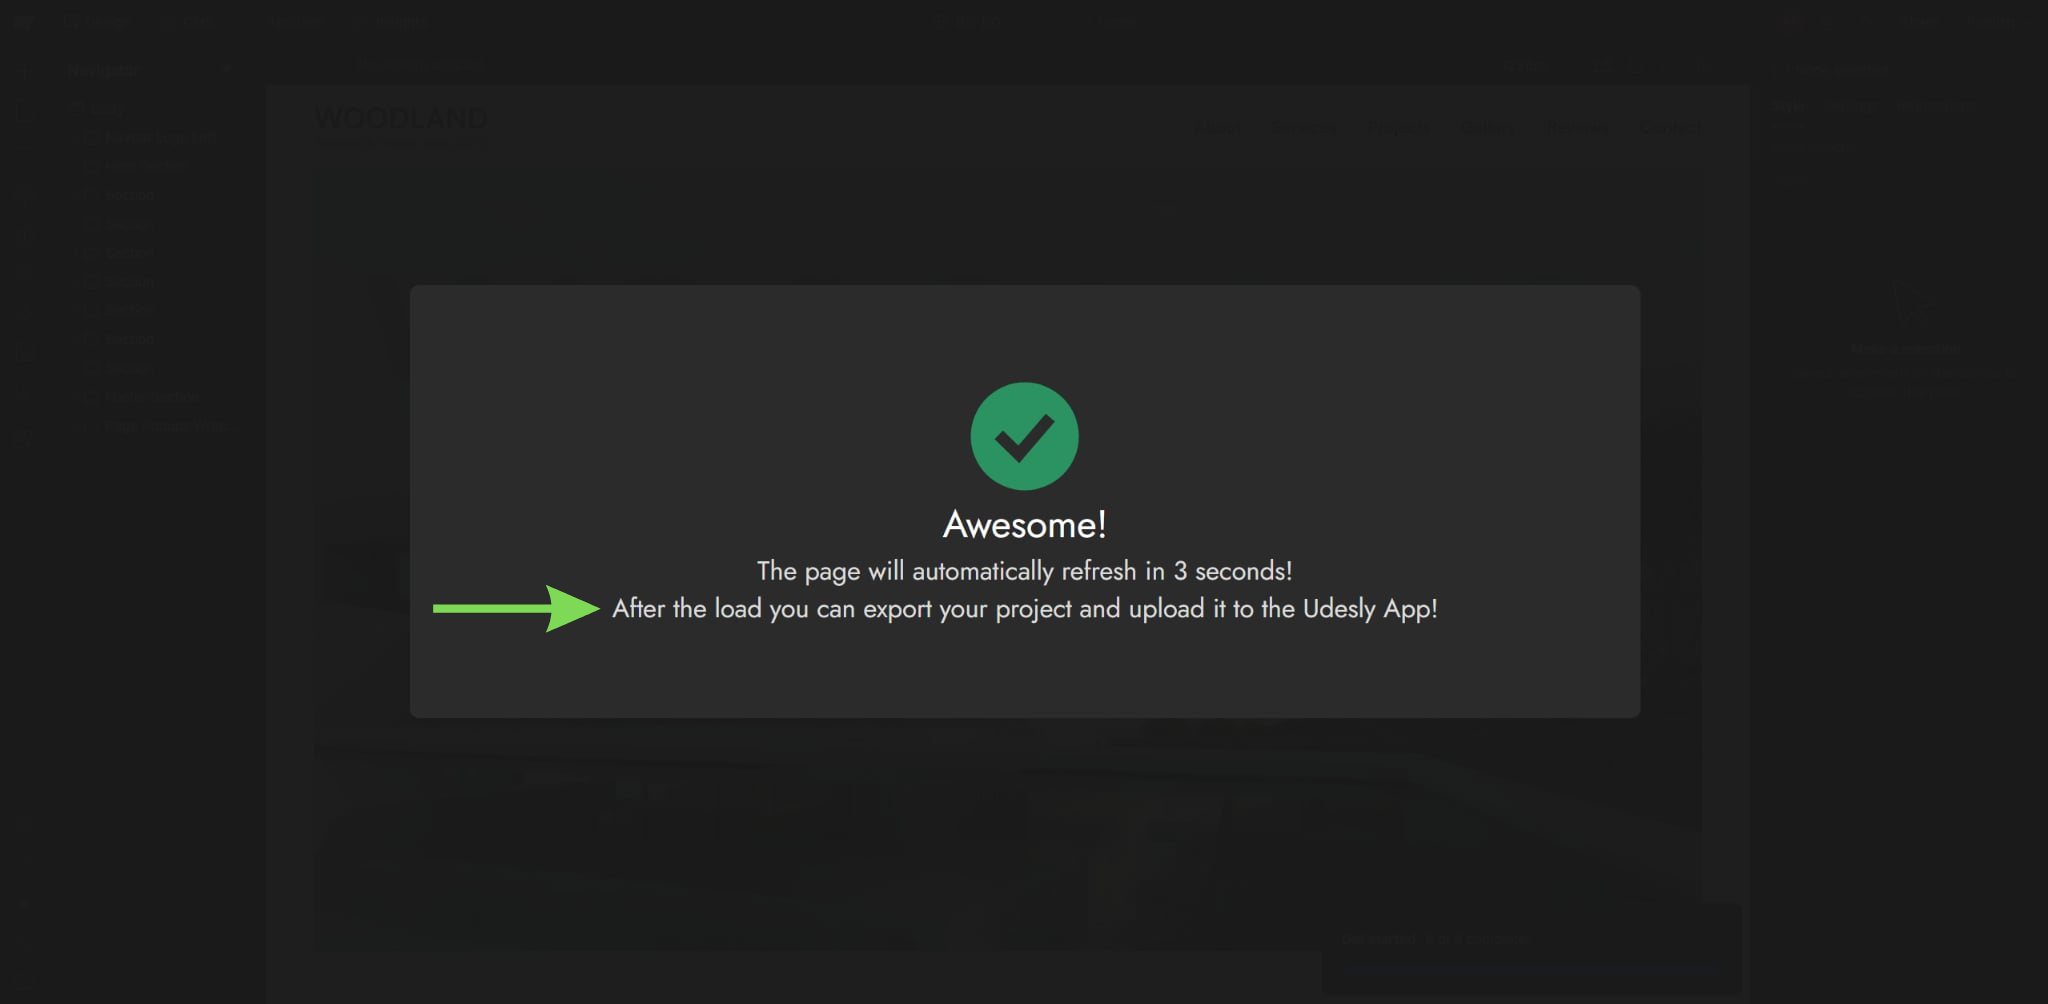
These attributes are then applied to elements in your Webflow project to define how content behaves inside WordPress.
This includes marking dynamic content, menus, and templates so everything maps correctly. This step prepares your design for CMS functionality.
Step 4: Export Your Webflow Code
After setting up attributes, you can export your Webflow project. Click Export Code (</>) in Webflow, then download the ZIP file and save it to your computer for the next step.
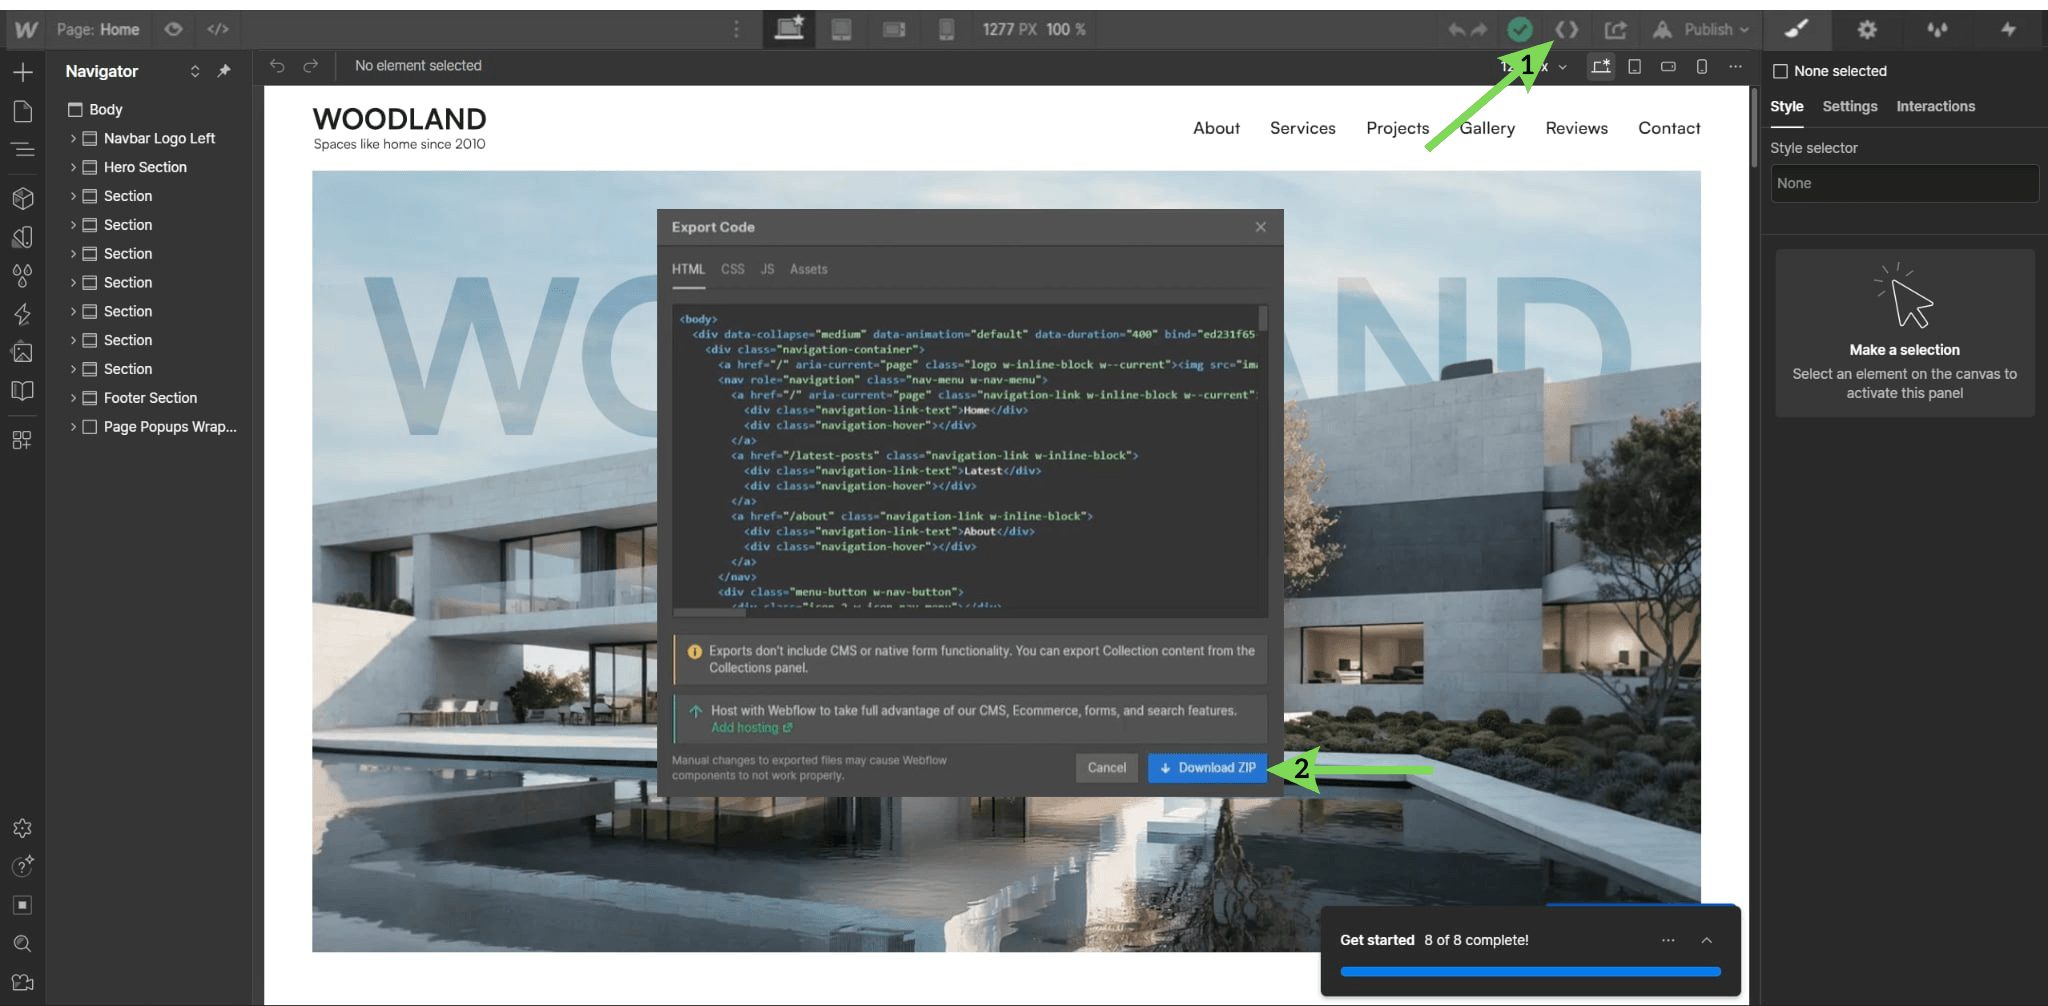
This generates the files needed to build your WordPress theme. The export includes HTML, CSS, JavaScript, and assets. These files will be used in the next step inside the Udesly platform. This is where your project leaves Webflow.

Step 5: Convert Files Using Udesly
The exported Webflow files need to be converted into a WordPress theme. This is done through the Udesly app. Check in advance whether you need to make a payment in the Udesly app.
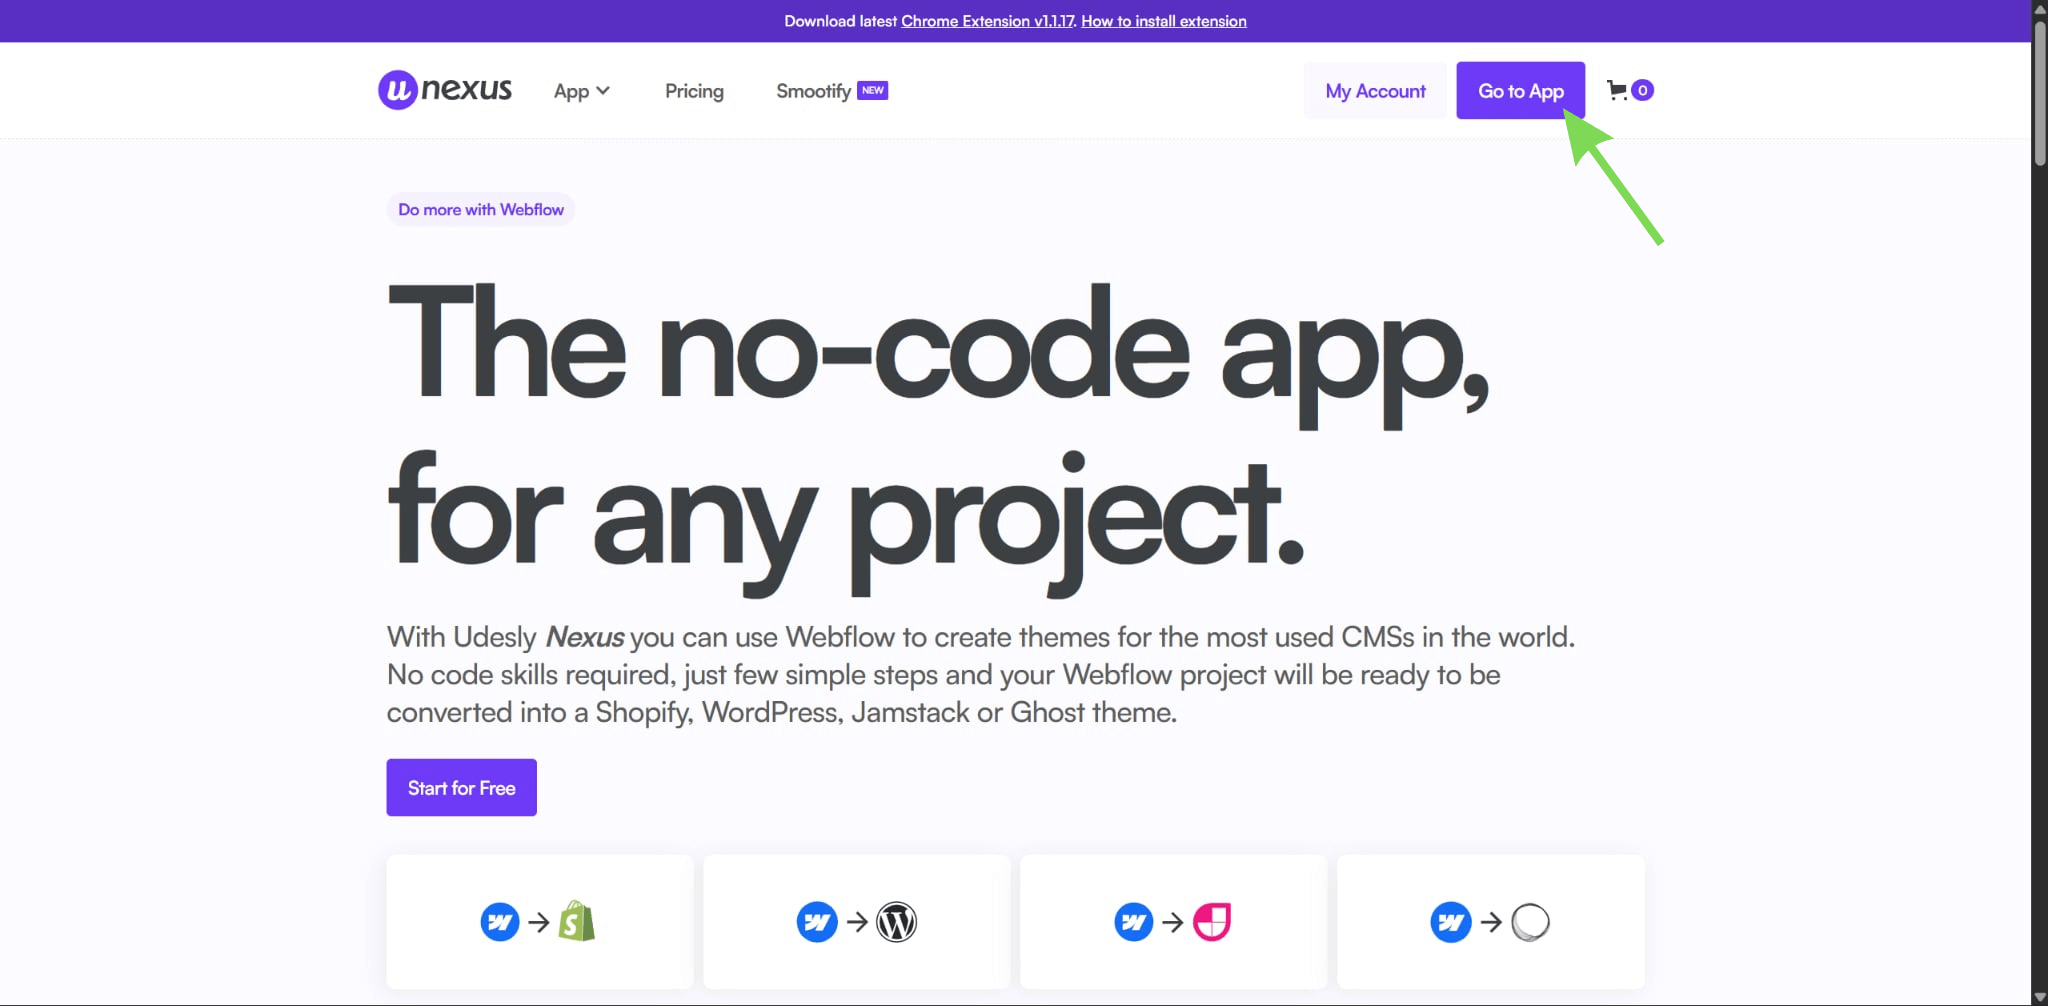
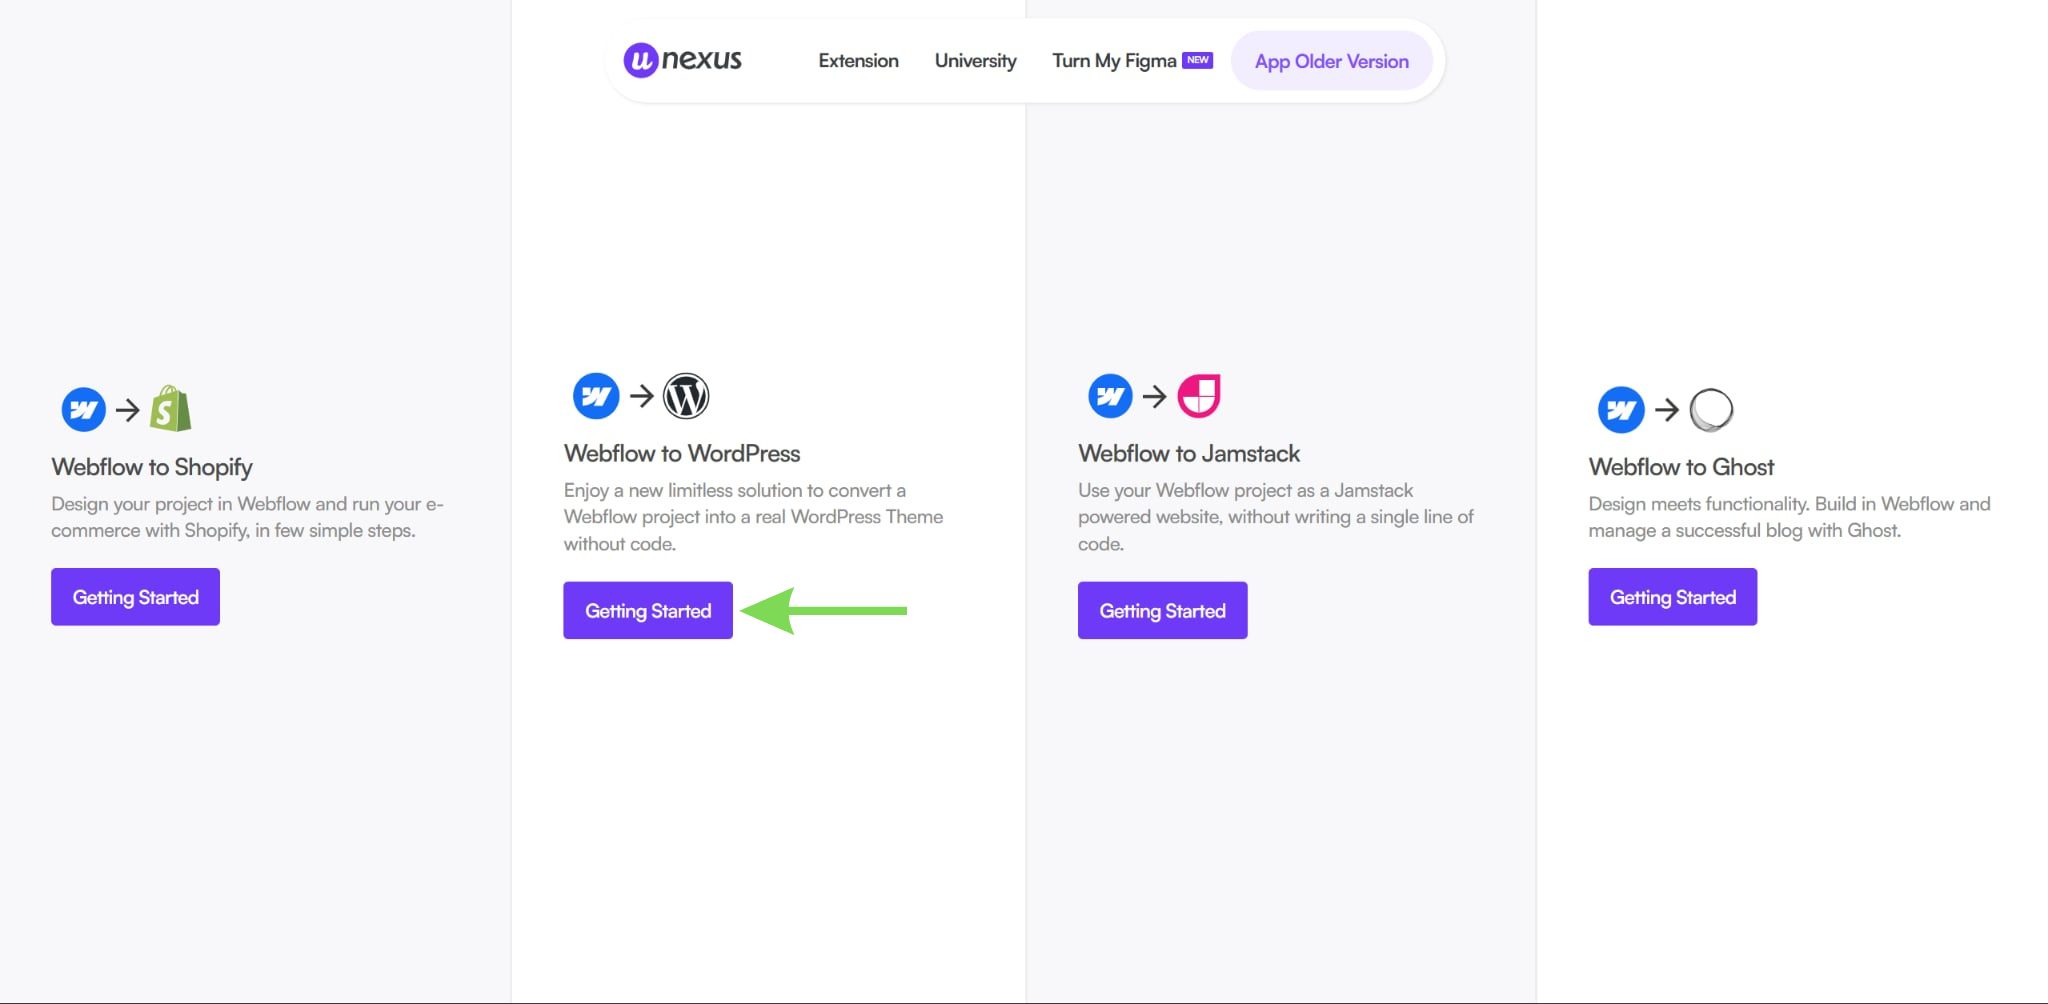
Select Webflow to WordPress as the target platform and get started.
Upload your exported ZIP file, run the conversion, and download the converted theme file.
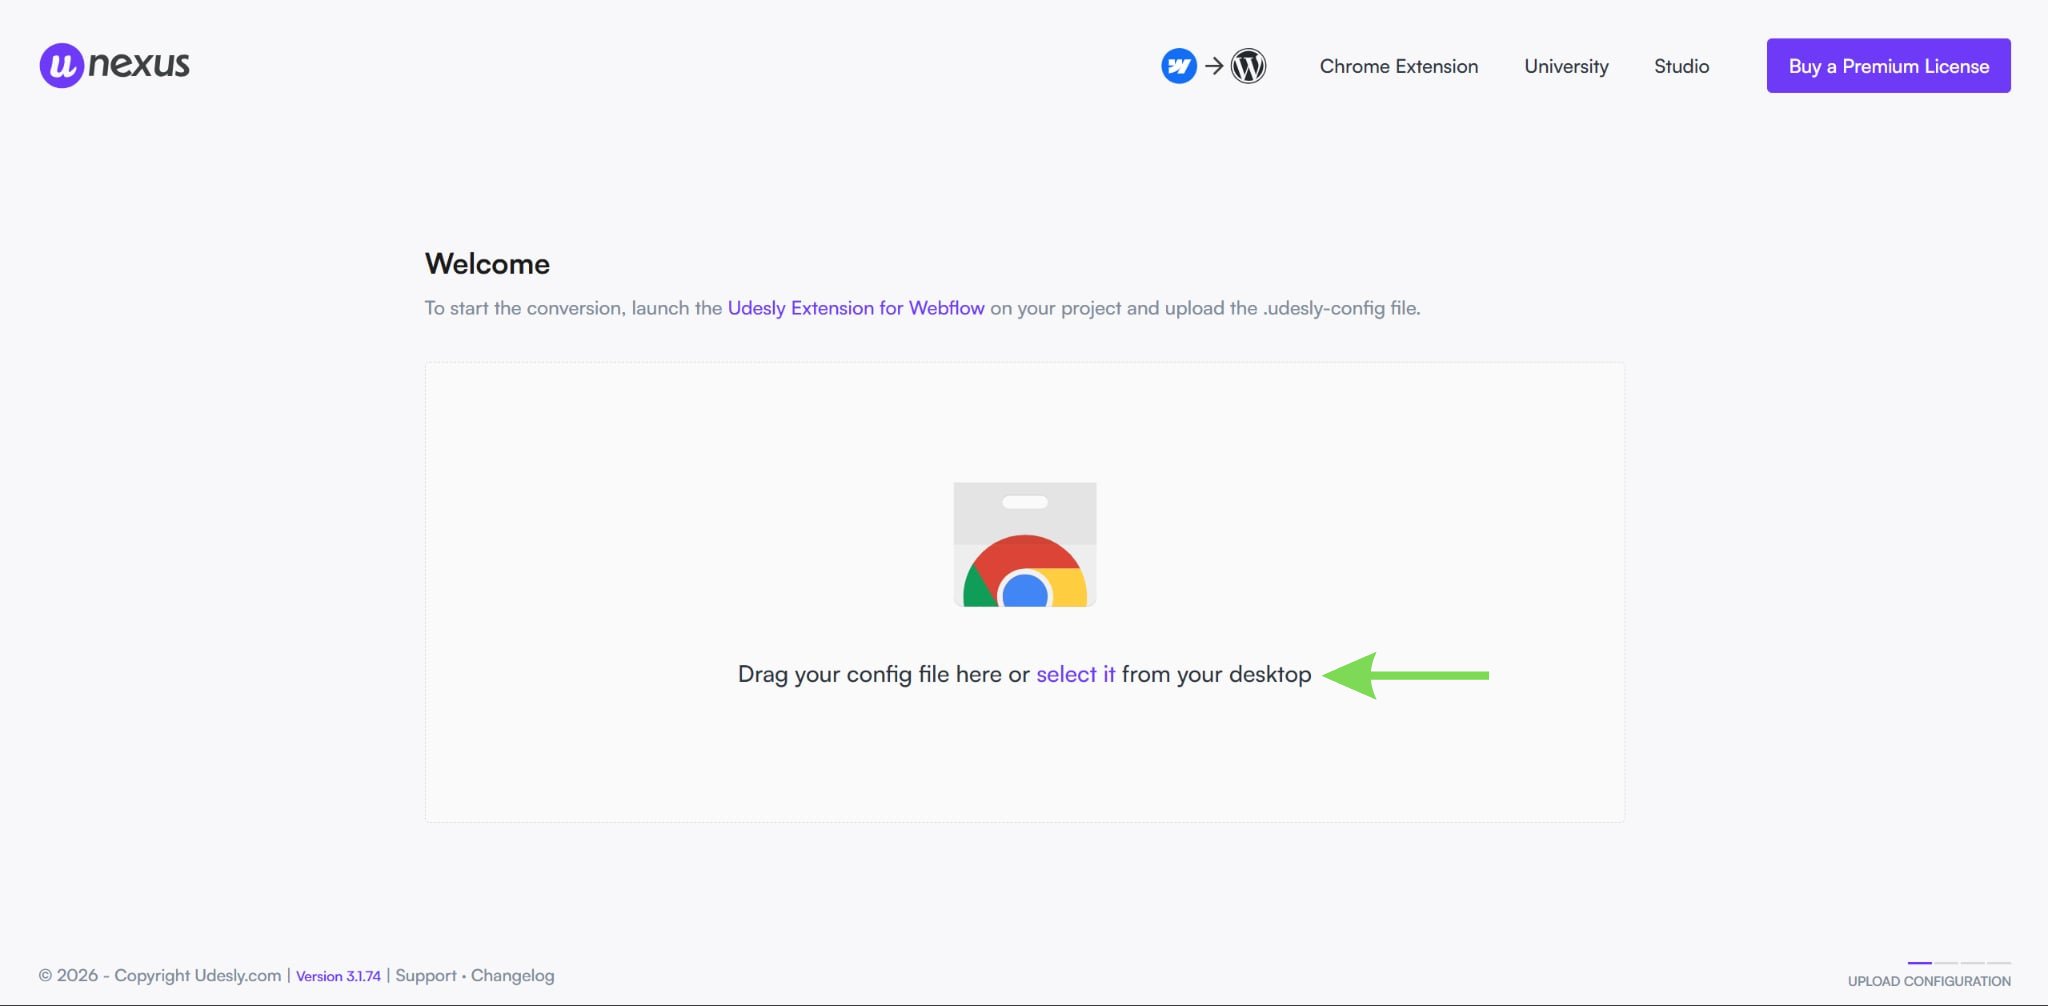
The system processes your files and restructures them for WordPress compatibility. Once completed, it generates a downloadable theme file. This is the core of the migration process.
Step 6: Upload Theme to WordPress
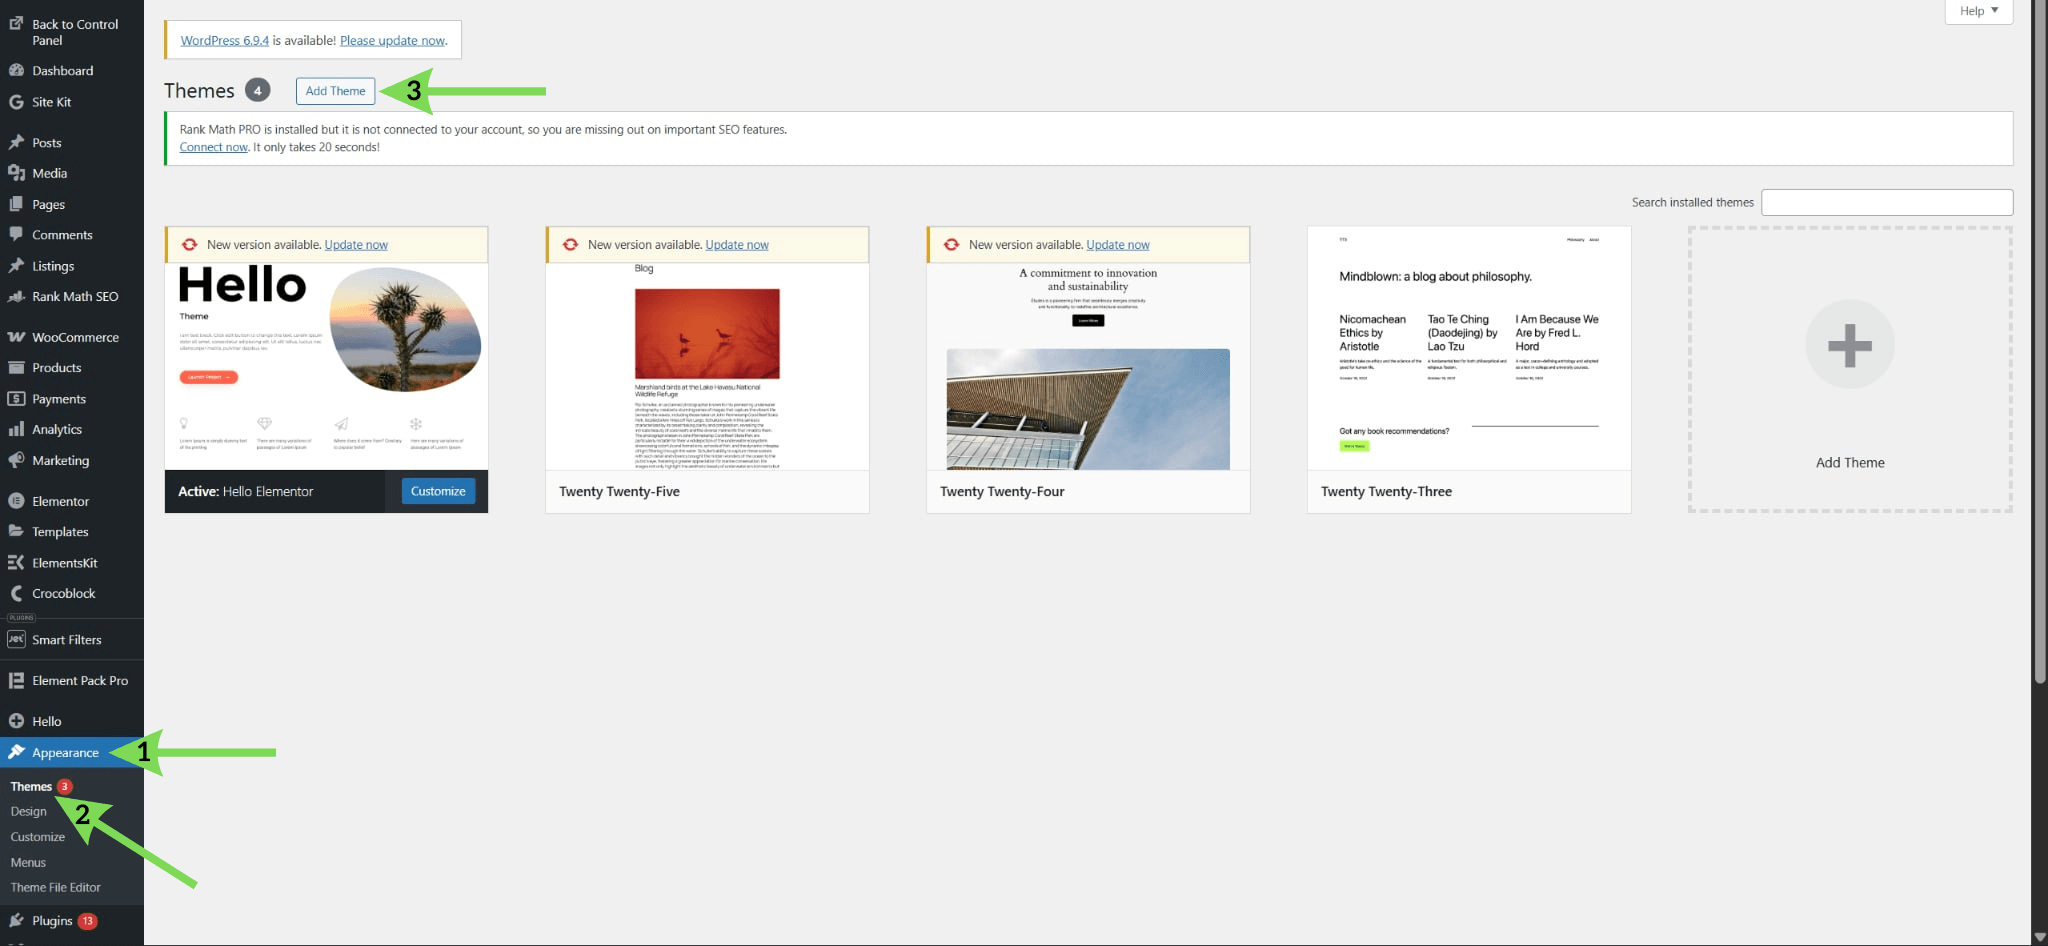
With your converted theme ready, the next step is to upload it to WordPress. Log in to the WordPress dashboard, go to Appearance > Themes, and click "Add New."
Upload the converted ZIP file and activate the theme. This installs your Webflow design as a working WordPress theme.
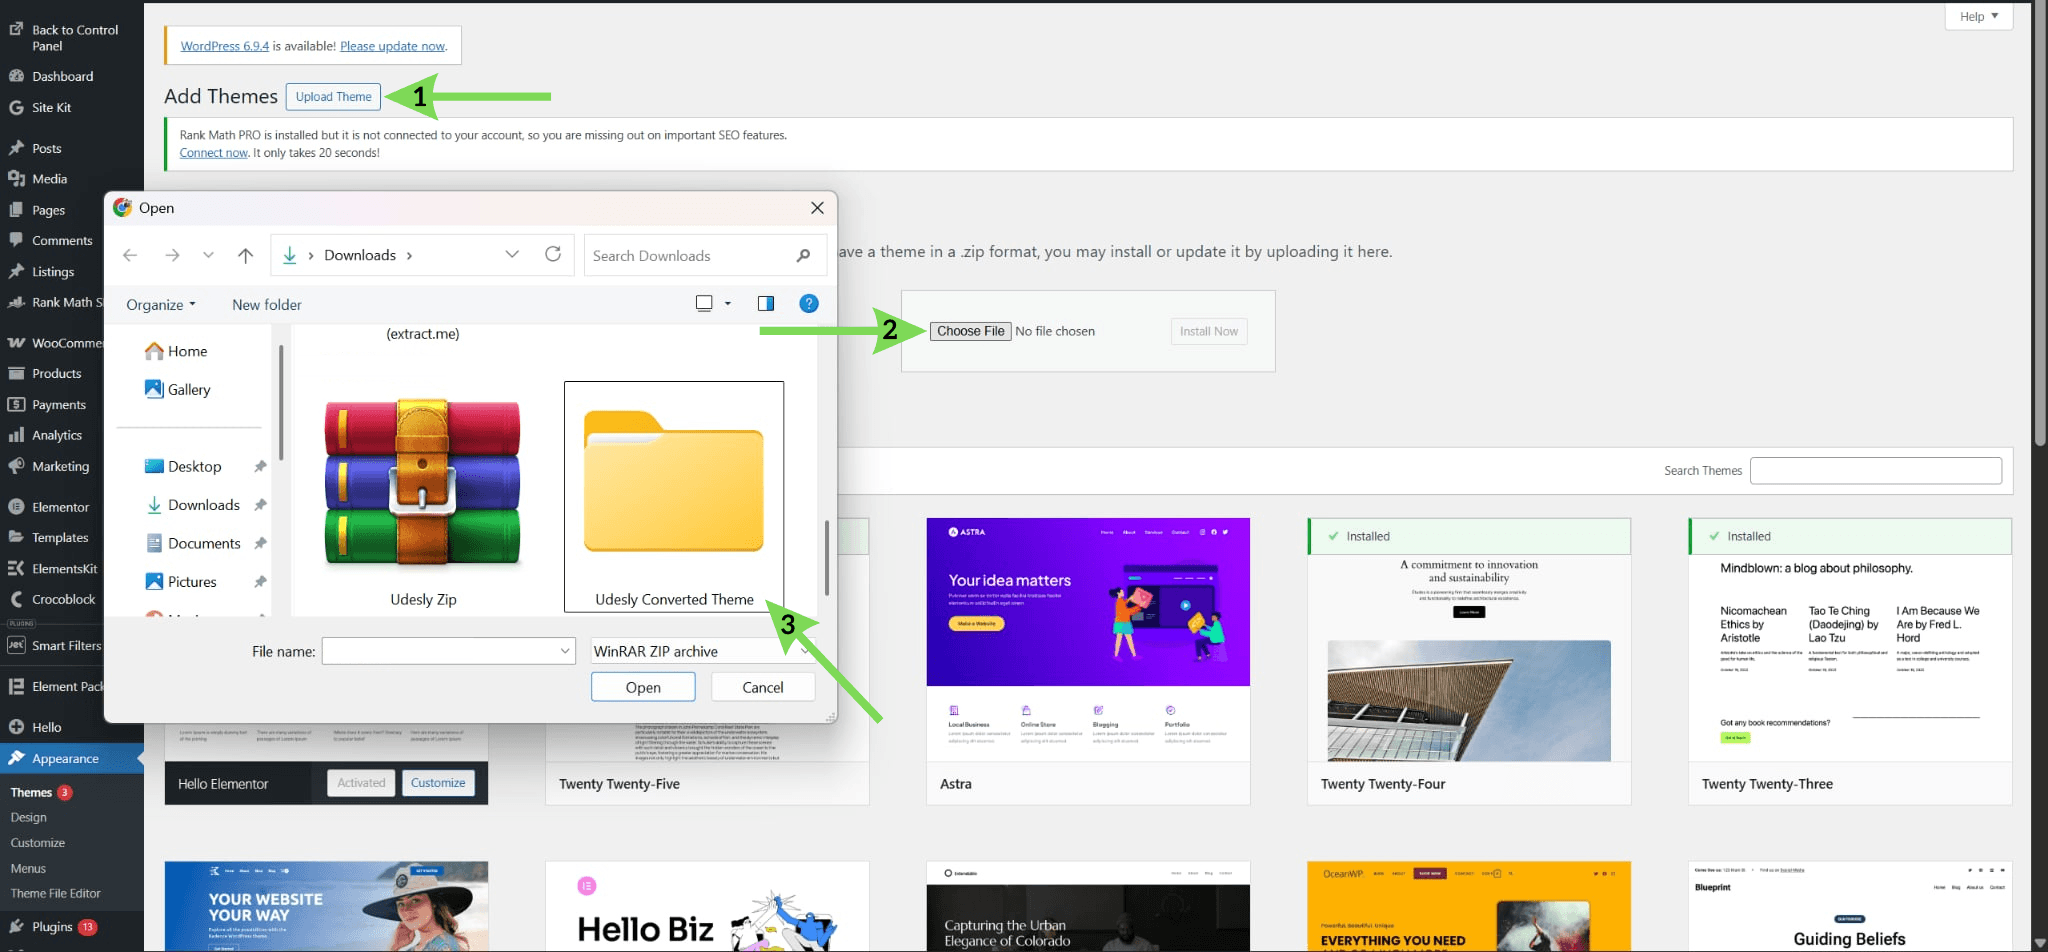
Once uploaded, it can be activated like any other theme. This step brings your design into your new environment.
Step 7: Configure Content and Test Your Website
After activating the theme, connect your content inside WordPress and review how everything displays across your site. This includes assigning pages, linking navigation, and ensuring that dynamic sections, such as blogs, function correctly.
Once everything is connected, go through your website to check the layout, navigation, and content display on different devices. Any issues found at this stage can be adjusted before launch. This step ensures your site is properly configured and ready to go live without errors.
Maintain your WordPress setup
Regularly check your WordPress setup to make sure everything continues to run smoothly over time. Even small changes, such as theme updates or plugin installations, can affect how your pages load and how your site functions. It is a good practice to review your website setup after making any changes.
This helps you catch issues early before they affect performance or user experience. You can also monitor your dashboard and key pages to confirm everything is still working as expected. Keeping your setup updated ensures your site remains stable, your layout stays consistent, and your website continues to perform without interruptions.
Conclusion
Migrating from Webflow to WordPress is an important step toward greater flexibility and control over how your website is managed and scaled. By following the correct process, from backing up your content to rebuilding your design and setting up redirects, you ensure that your site transitions smoothly and continues to perform as expected.
At Jump.bg, we understand that a successful migration also depends on a stable and optimised hosting environment. Our WordPress hosting is built to support consistent performance, helping your site load efficiently and remain reliable as it grows. If you need assistance with your migration or want a hosting solution that supports long-term stability, you can contact us anytime at support@jump.bg or 02 448 4023.