Automating your website tasks can save time and reduce repetitive work. n8n is a workflow automation tool that connects apps and services, while WordPress is a content management system for building and managing websites. Connecting n8n to WordPress allows you to automate content publishing, data handling, and workflow processes without manual effort.
In this article, we will show you how to integrate n8n with WordPress using a simple, reliable setup. This includes preparing your WordPress credentials, connecting n8n, creating a workflow, and testing your integration to ensure everything works correctly.
Key Takeaways:
Integrating n8n with WordPress allows you to automate content publishing and workflows without manual effort. Using Application Passwords and properly configured workflows ensures a secure and reliable connection. Testing and maintaining your setup helps keep your automation consistent and error-free over time.
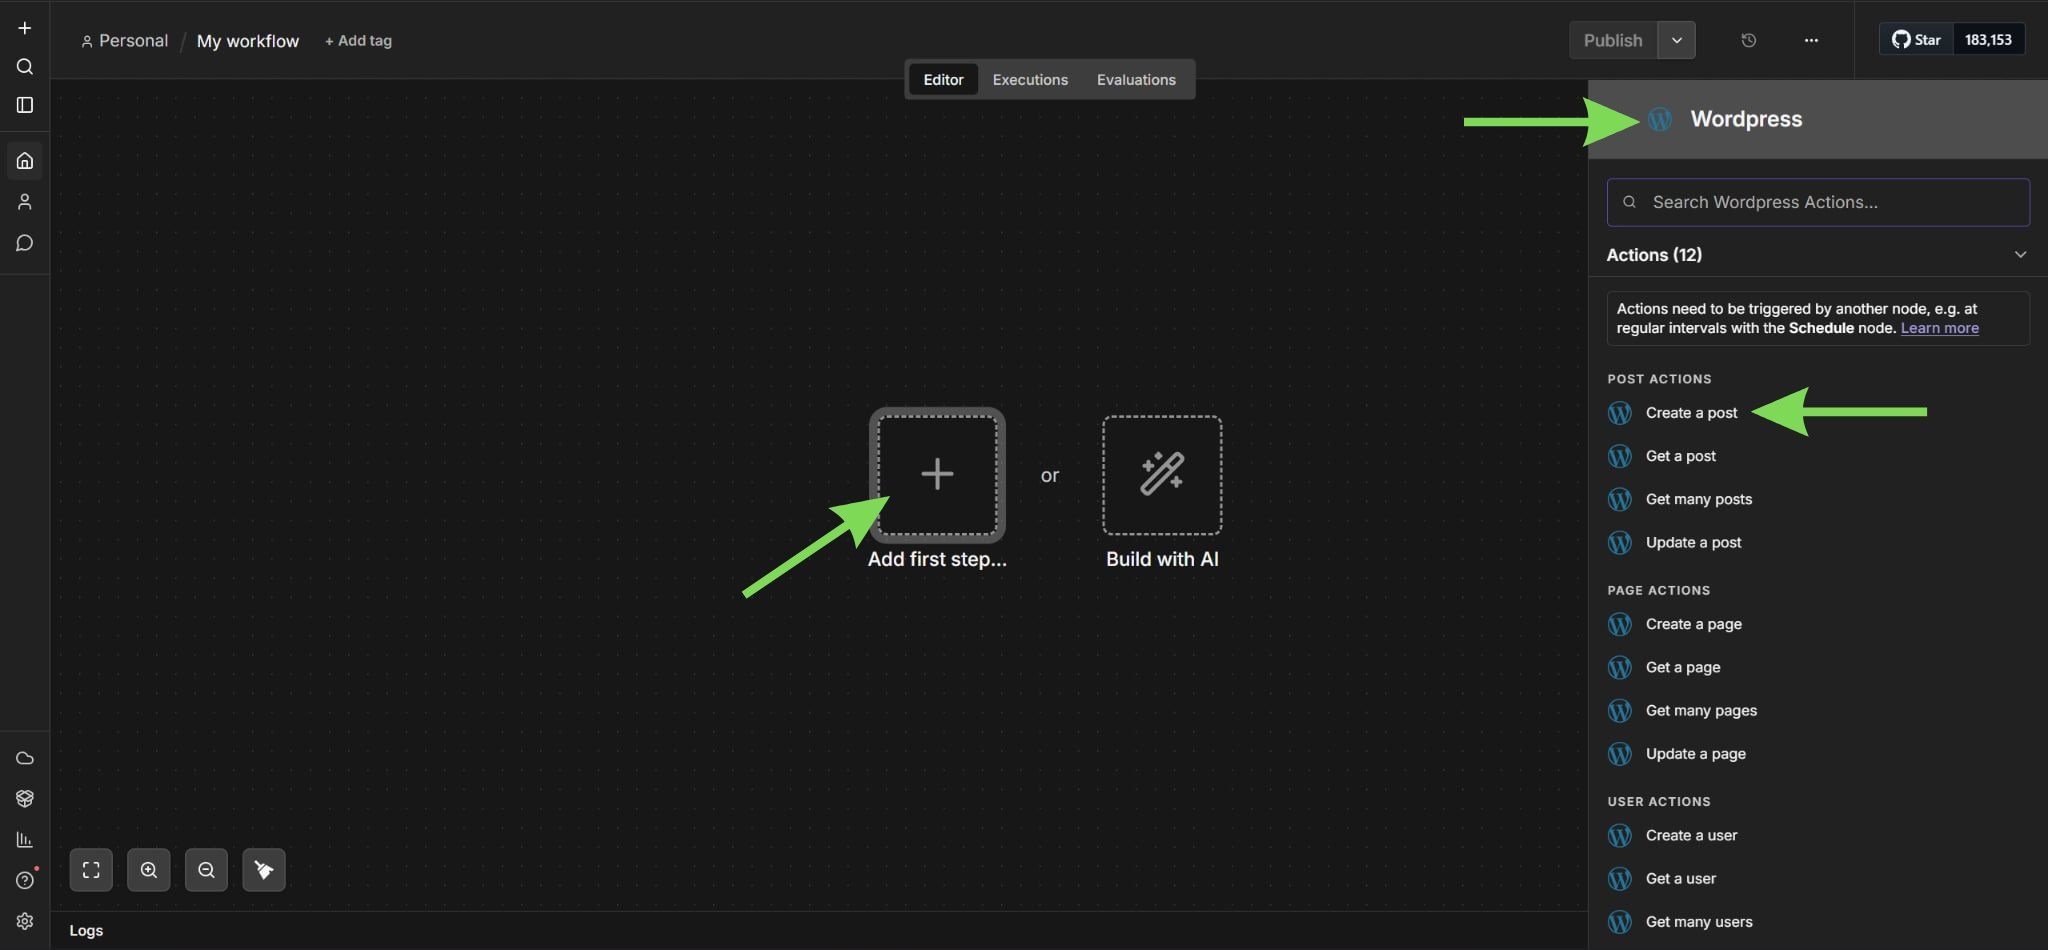
Step 1: Create a new workflow in n8n
Open your n8n dashboard and create a new workflow to start the setup. This is where your automation will be built and managed. Once inside the workflow editor, search for the WordPress node from the node panel.
Add the WordPress node to the canvas to begin connecting your site. This sets up the foundation for your integration before configuring any credentials or actions.
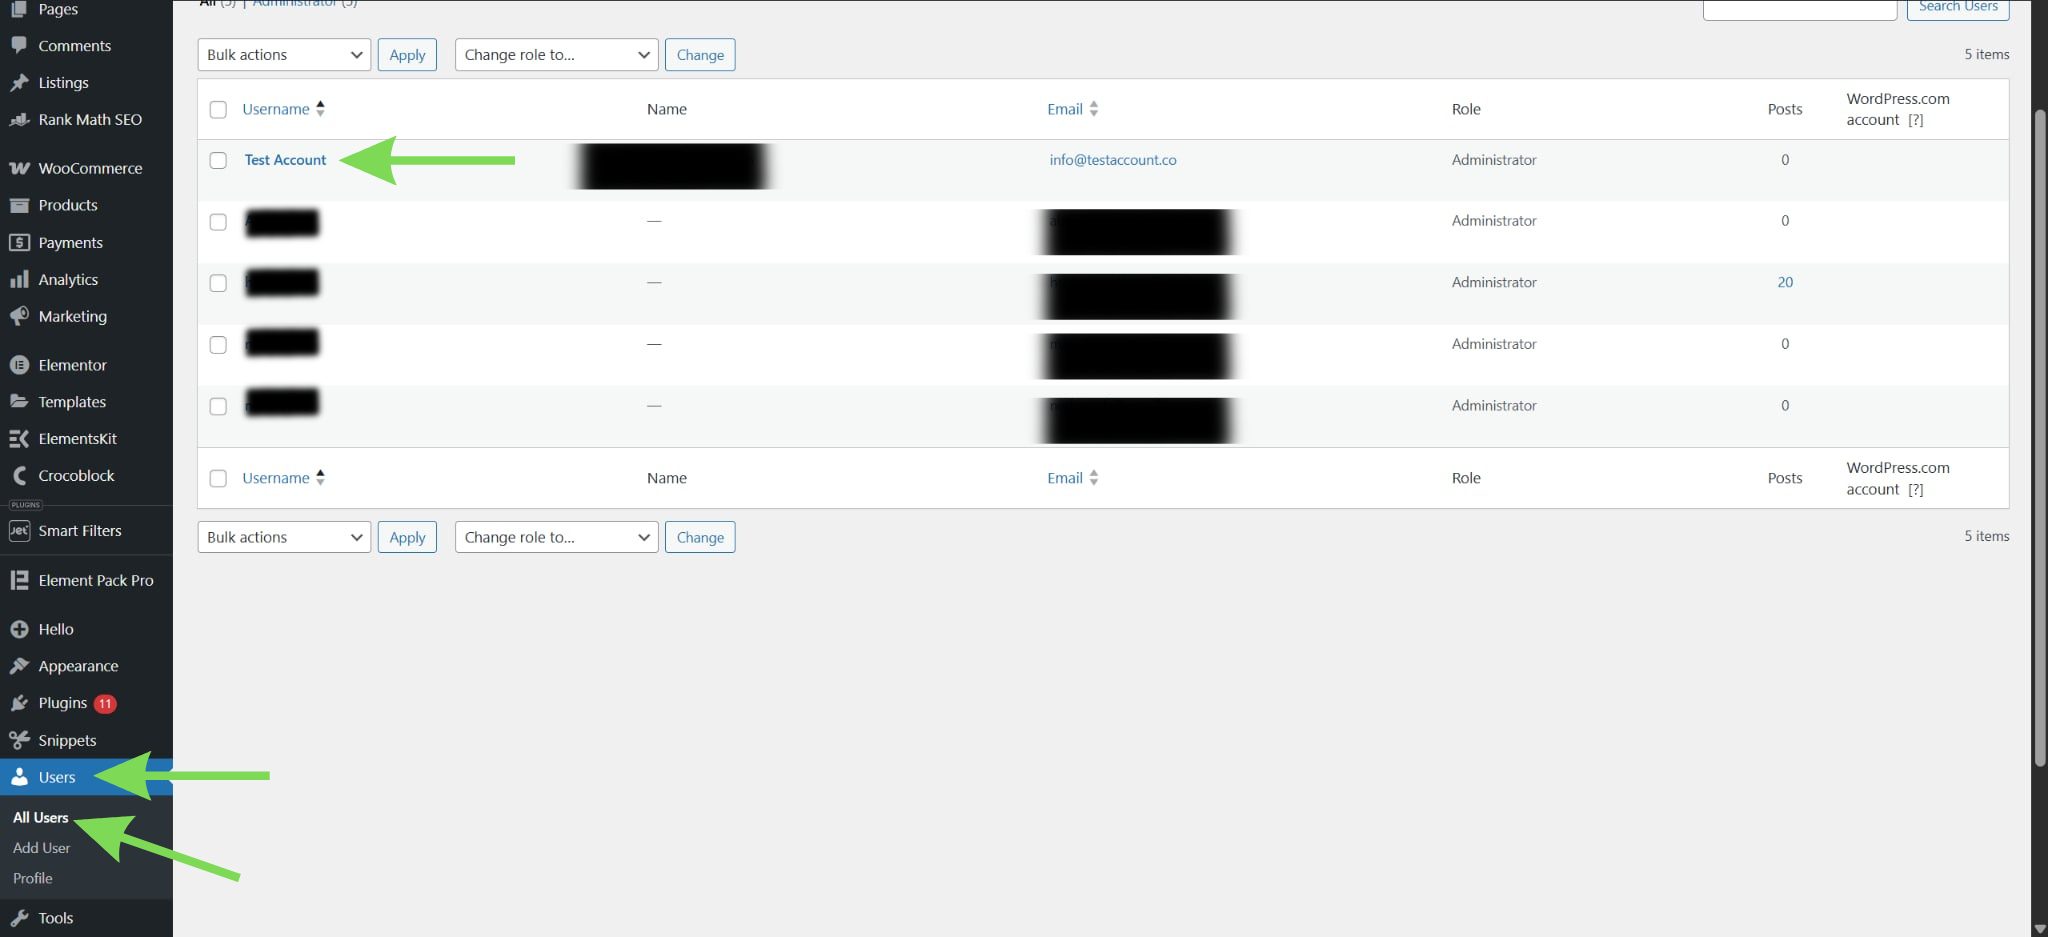
Step 2: Prepare credentials and create an Application Password
Make sure you have your WordPress site URL and username ready, and confirm your account has permission to create or edit content. Log in to your WordPress dashboard and go to Users > All Users, then open your user profile.
Take a moment to verify that your site is accessible over HTTPS and that you are using the correct admin account.
These details will be used in the next step when creating the connection. Having them prepared in advance keeps the setup straightforward and reduces the chance of login or permission errors.
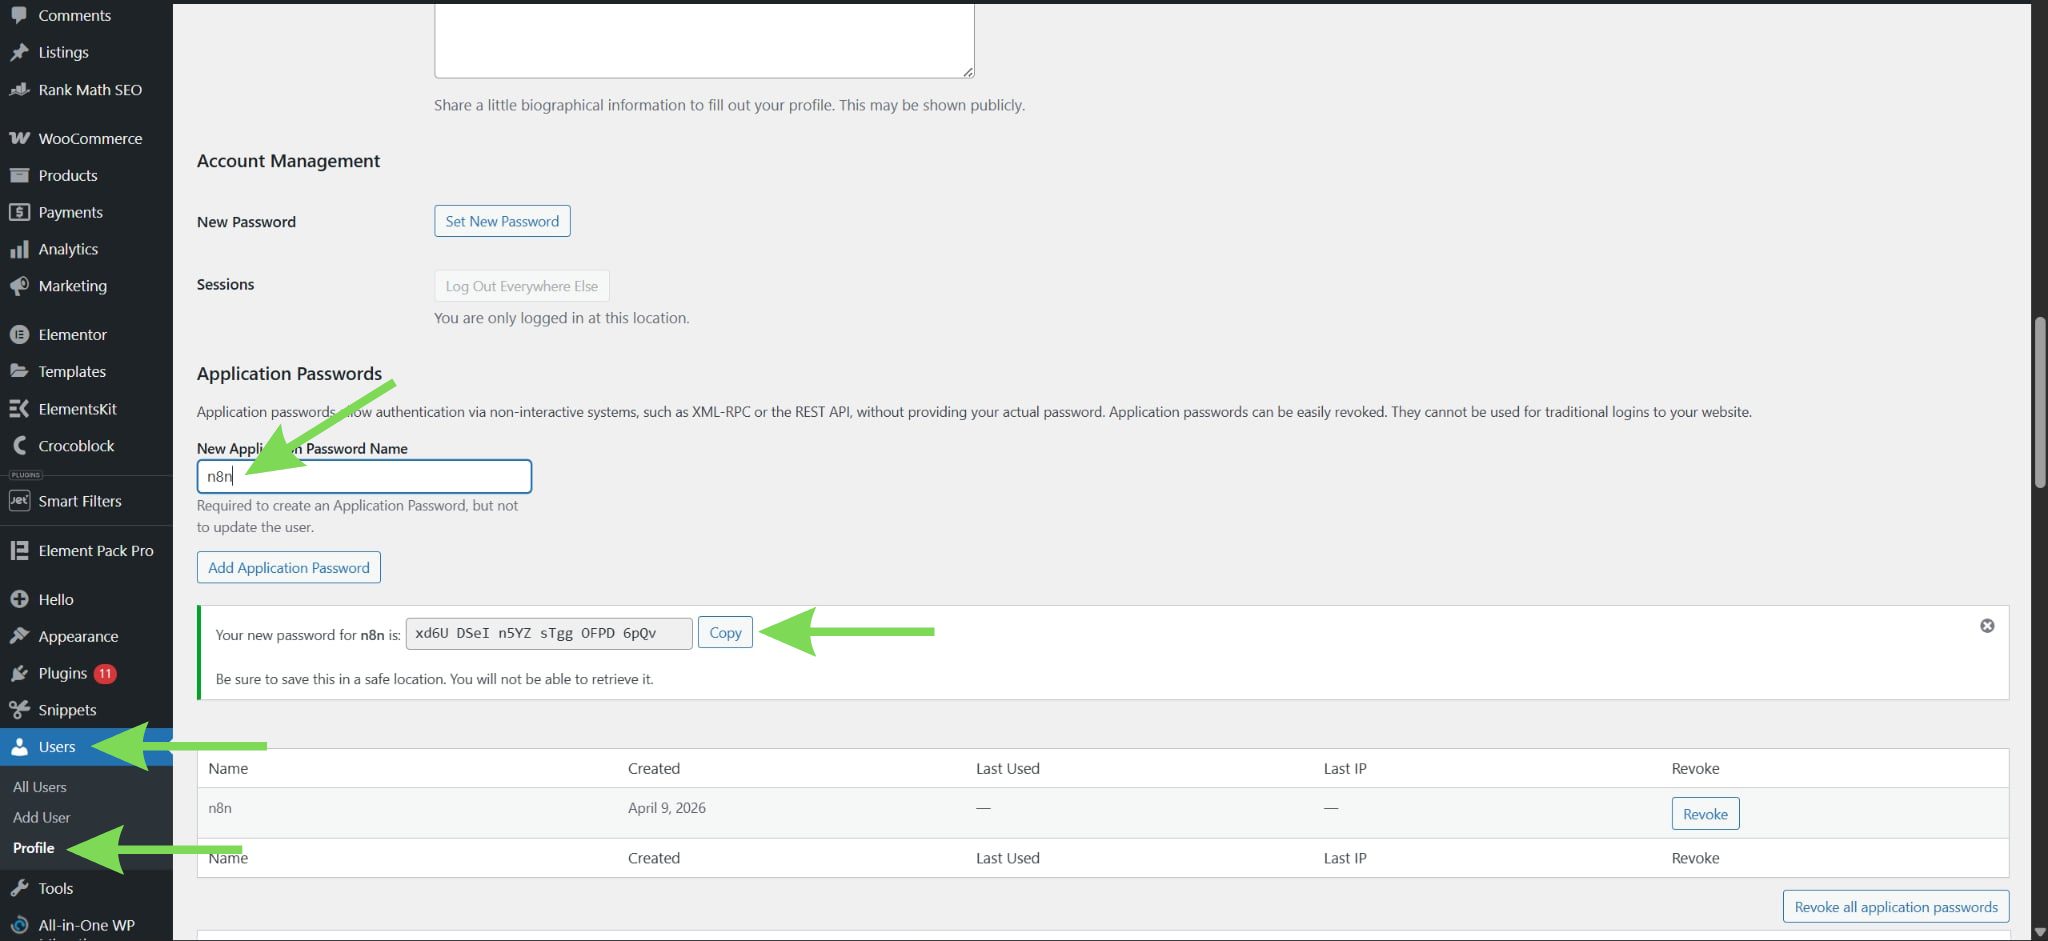
Step 3: Create an Application Password for the n8n connection
Click your user profile, scroll down to the Application Passwords section, type “n8n” as the name, and generate the password. This password is used for secure API authentication over HTTPS and is the recommended method for connecting n8n to WordPress.
Copy the generated password immediately and store it safely, as you will use it in n8n. Having these details prepared in one step keeps the connection process smooth and avoids setup errors.
Step 4: Add your WordPress credentials in n8n
Go back to n8n and open the credential setup for the WordPress node. Enter your WordPress site URL, your username, and the Application Password you generated.
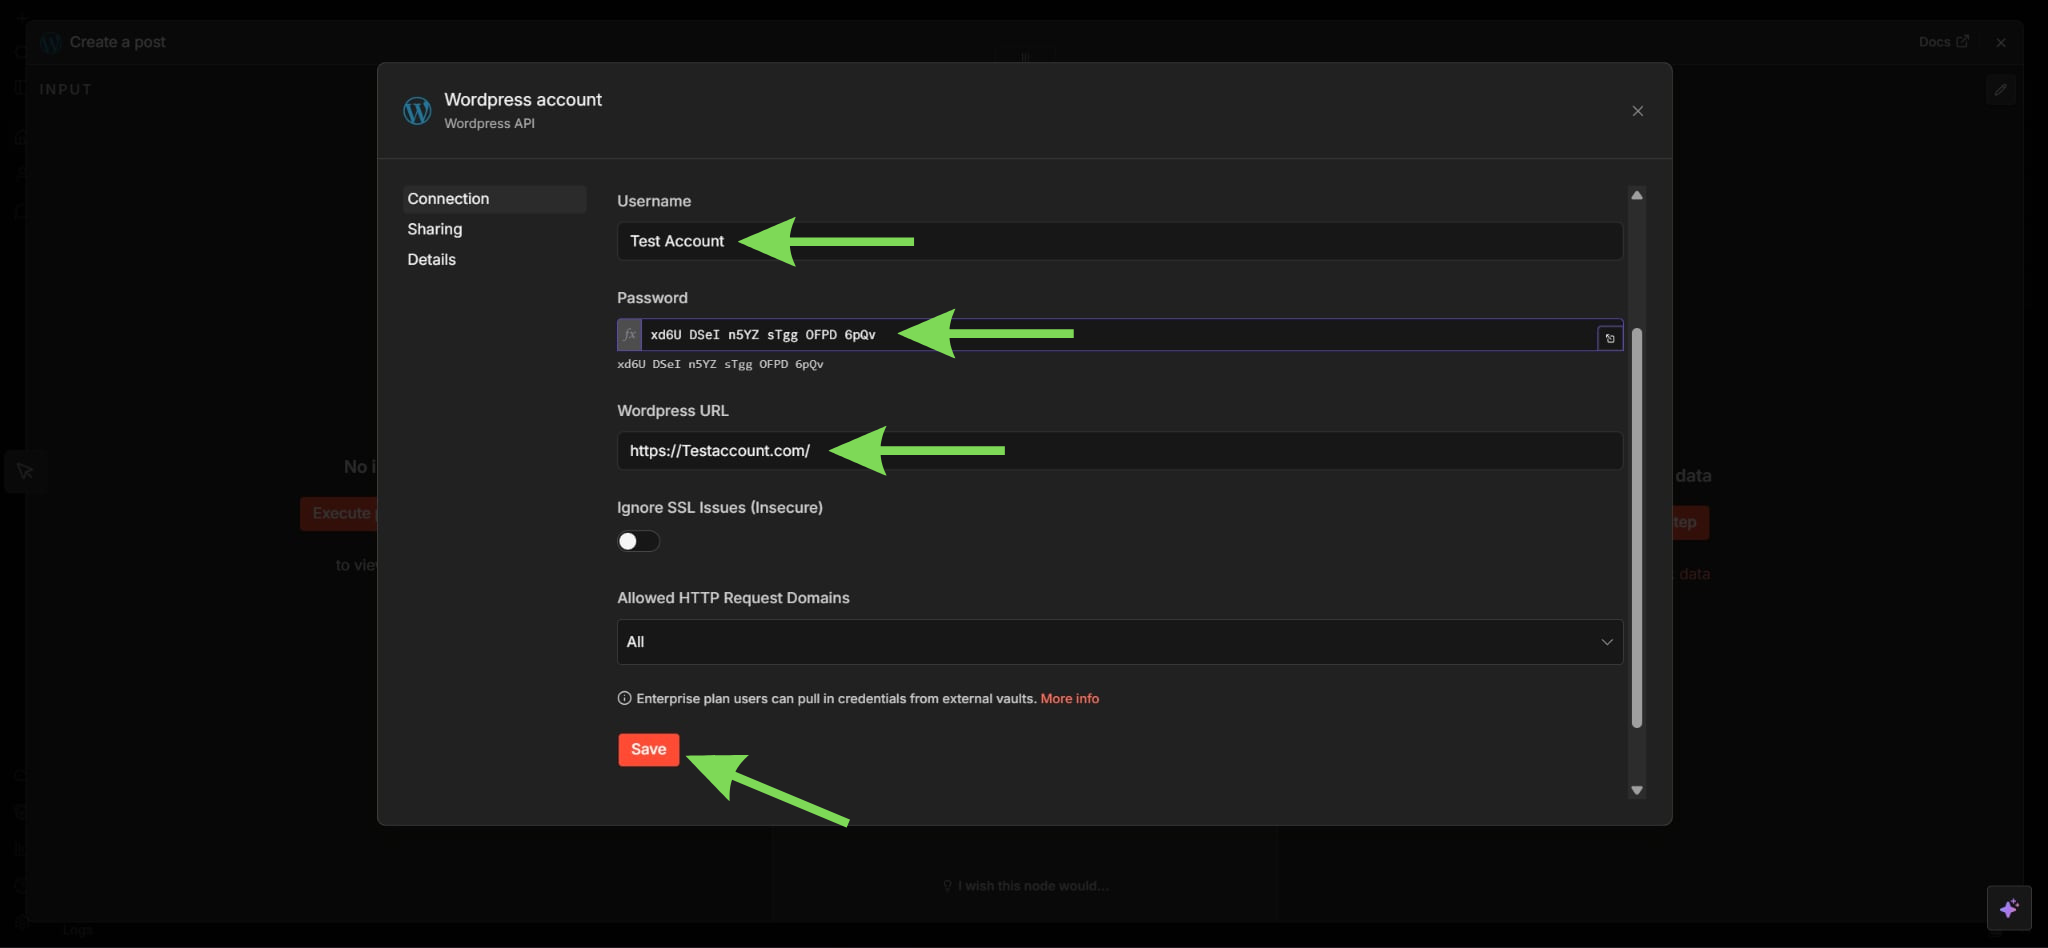
Make sure your site uses HTTPS and that the URL is entered correctly. Save the credentials and test the connection to confirm that n8n can access your WordPress site.
n8n’s WordPress setup is designed around authenticated credentials, so this is the step that fully links both platforms.
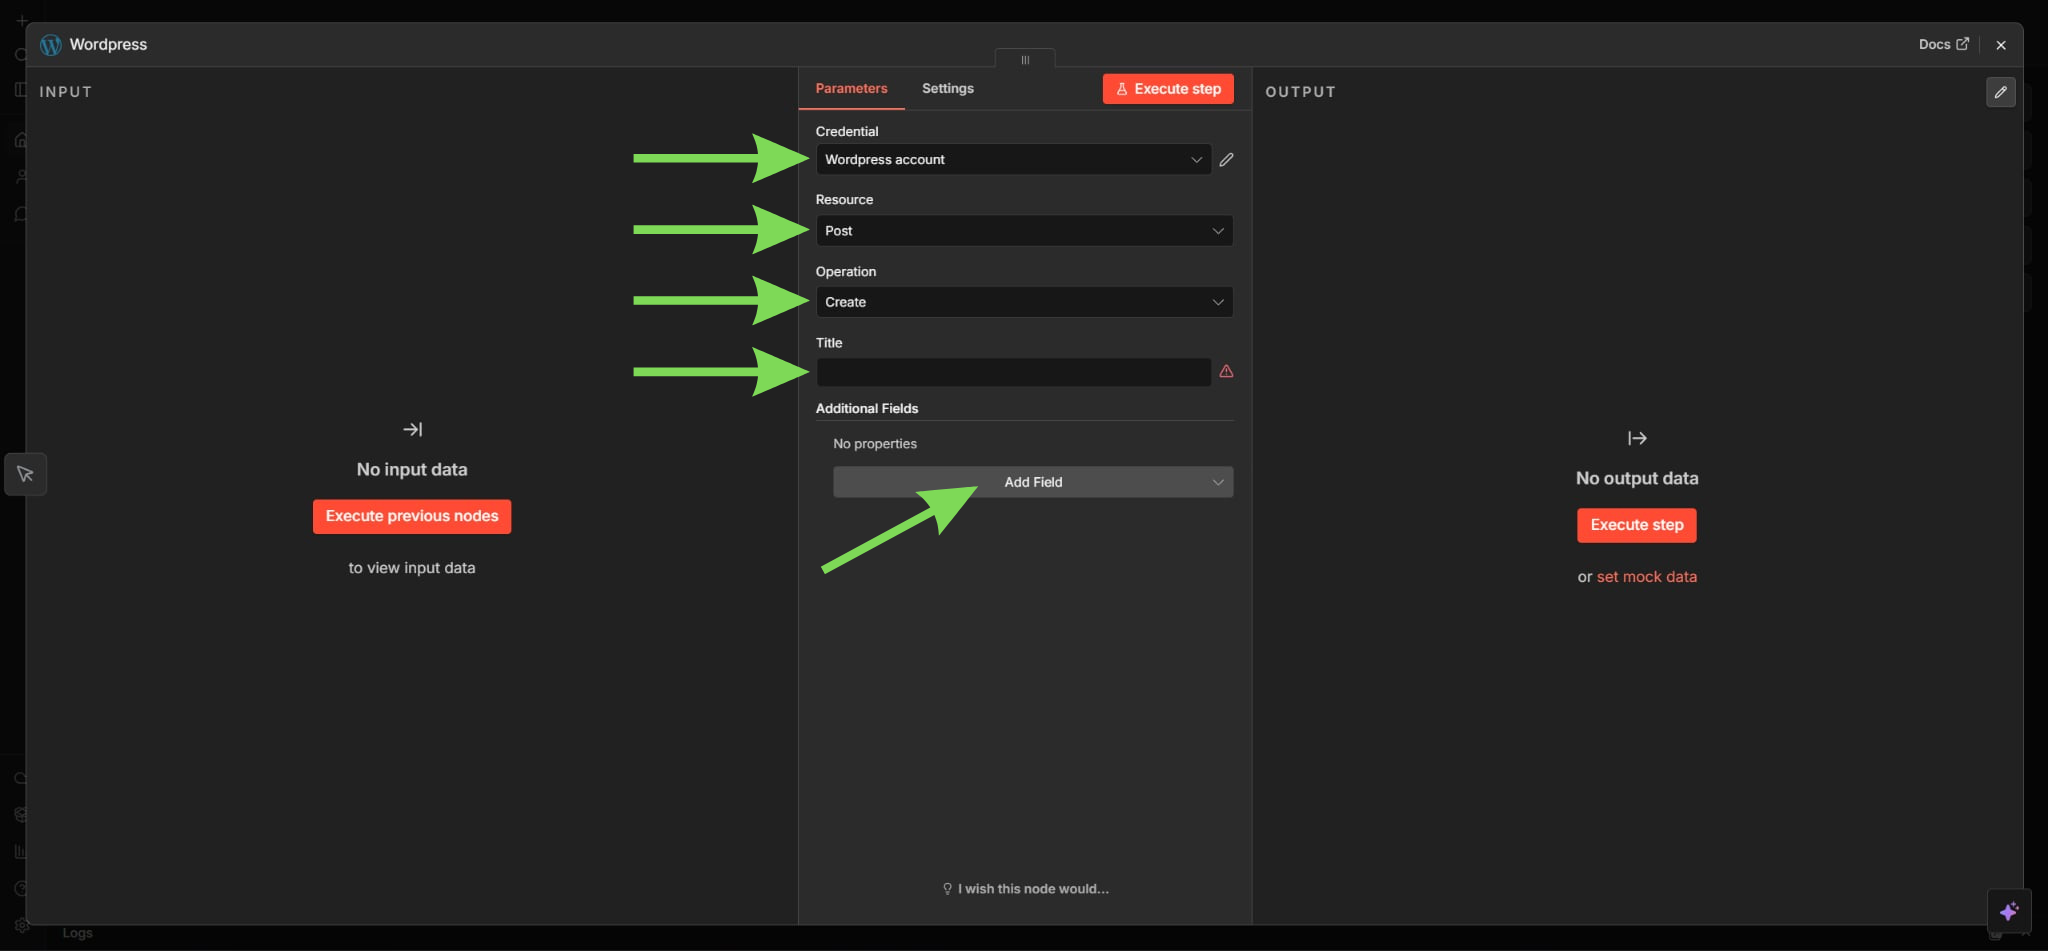
Step 5: Choose the WordPress action you want to automate
After the connection is working, choose the action you want the WordPress node to perform. Common options include creating a post, updating a post, or retrieving existing posts.
This is where your integration starts becoming useful, since the workflow now has a clear purpose. Keeping the action selection separate from the credential setup also avoids overlap and makes the process easier to follow.
Step 6: Run a test and confirm the connection
Execute the workflow to test whether the action works correctly. Then check your WordPress dashboard to confirm that the post or update was completed as expected.
Testing is important because it helps catch credential errors, field issues, or connection problems before the workflow is activated. n8n also supports step-by-step testing, which is one of the reasons this setup is practical for beginners and advanced users alike.
Step 7: Common issues and how to fix them
If your integration is not working, review each step carefully.
Most issues come from incorrect credentials or an invalid Application Password. Make sure your site URL is correct and uses HTTPS.
Permission issues can also prevent actions from working. Ensure your WordPress user role has the correct access level.
If using webhooks, confirm that the correct URL is being triggered and that your workflow is active.
Taking time to check these details usually resolves most connection problems quickly.
Maintain your automation and monitor performance
After your integration is active, review your workflows regularly to ensure everything continues to work correctly.
Check your WordPress site to confirm that posts, updates, or actions are being executed as expected. Monitoring your workflows helps identify issues early and keeps your automation reliable.
If you make changes to your WordPress setup, such as installing new plugins or updating your theme, revisit your n8n workflows to ensure the connection is still functioning properly.
Conclusion
Integrating n8n with WordPress is essential if you want to automate your content management and streamline your workflow processes. By following the correct setup process, from creating secure credentials to building and testing your workflow, you ensure your website automation runs reliably and consistently. Taking time to test your setup and confirm everything is working correctly helps prevent errors and gives you a strong foundation for scaling your automation.
At Jump.bg, we know that reliable automation also depends on a stable and optimized hosting environment. Our WordPress hosting is designed to support consistent performance, helping ensure your workflows run smoothly without interruptions or failures. If you need help getting started or want a hosting setup that supports reliable automation, you can reach out to us anytime at support@jump.bg.