
Getting AdSense working in WordPress depends on setting it up correctly from the start. Small issues with connection or placement can prevent ads from showing or cause them to display incorrectly. Following a clear step-by-step process helps keep everything simple and avoids common mistakes.
The focus is on properly connecting your site and ensuring the code runs across all pages. Once everything is in place, your ads can display consistently without affecting your layout. This guide follows a straightforward method used in real tutorials.
Key Takeaway:
Setting up AdSense in WordPress comes down to following the right process and placing the code correctly from the start. Small setup details can affect how your ads display and perform across your site. Using tools like Site Kit or a manual method gives you flexibility depending on how much control you want. Once everything is connected properly, your ads can run consistently without affecting your layout or user experience. A clean setup ensures your site is ready to generate revenue while staying stable and easy to manage.
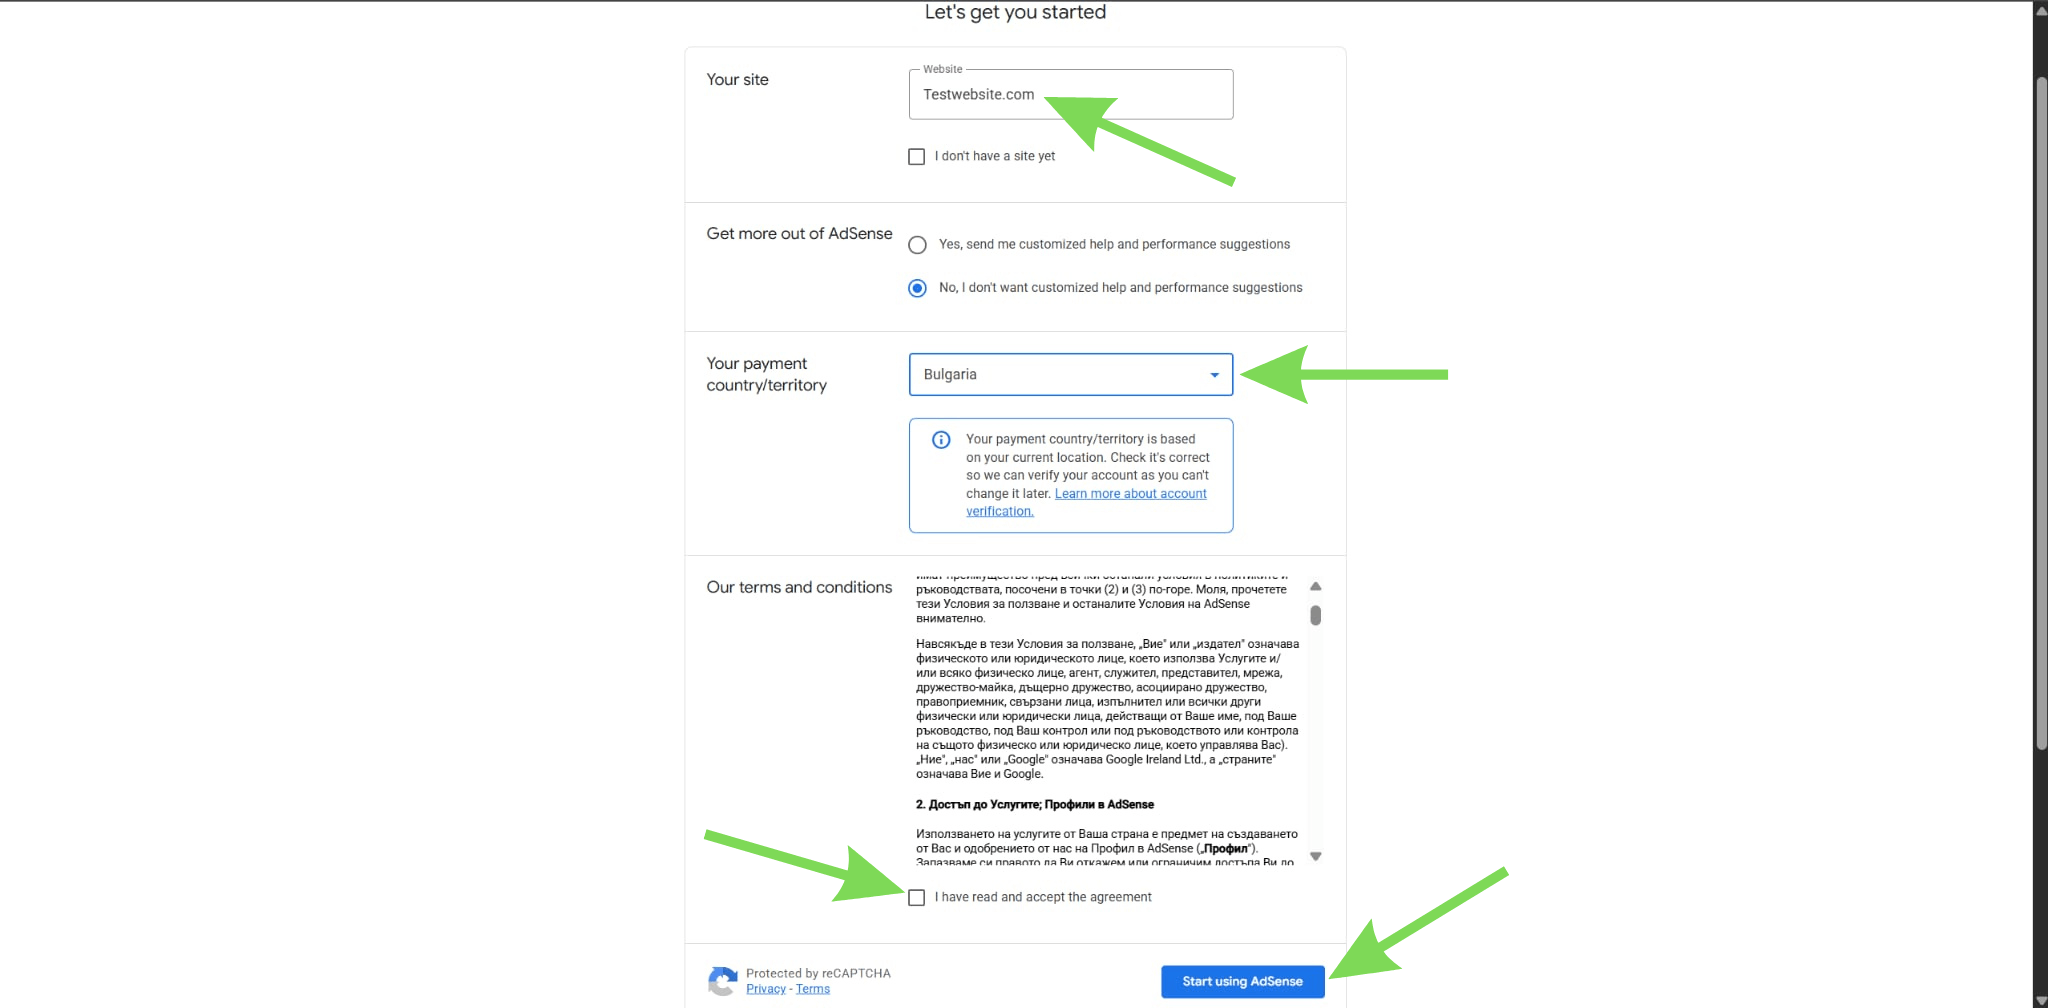
Step 1: Log in to your AdSense account
Start by going to your Google AdSense account and signing in. Once inside, make sure your website is already added to your account. If it has not been added yet, you will need to register your site first.
This step ensures that your website is recognized by AdSense. Without this connection, ads will not run on your site. Take a moment to confirm your account and site details are correct. This prepares everything for the next steps.
Step 2: Go to your WordPress dashboard
Log in to your WordPress admin panel using your website credentials. Once inside, navigate through your dashboard to access plugins and settings. This is where you will handle the integration process. Having full access to your dashboard is important for setup.
Make sure you are using the correct website before proceeding. This avoids confusion if you manage multiple sites. You are now ready to install the required plugin.
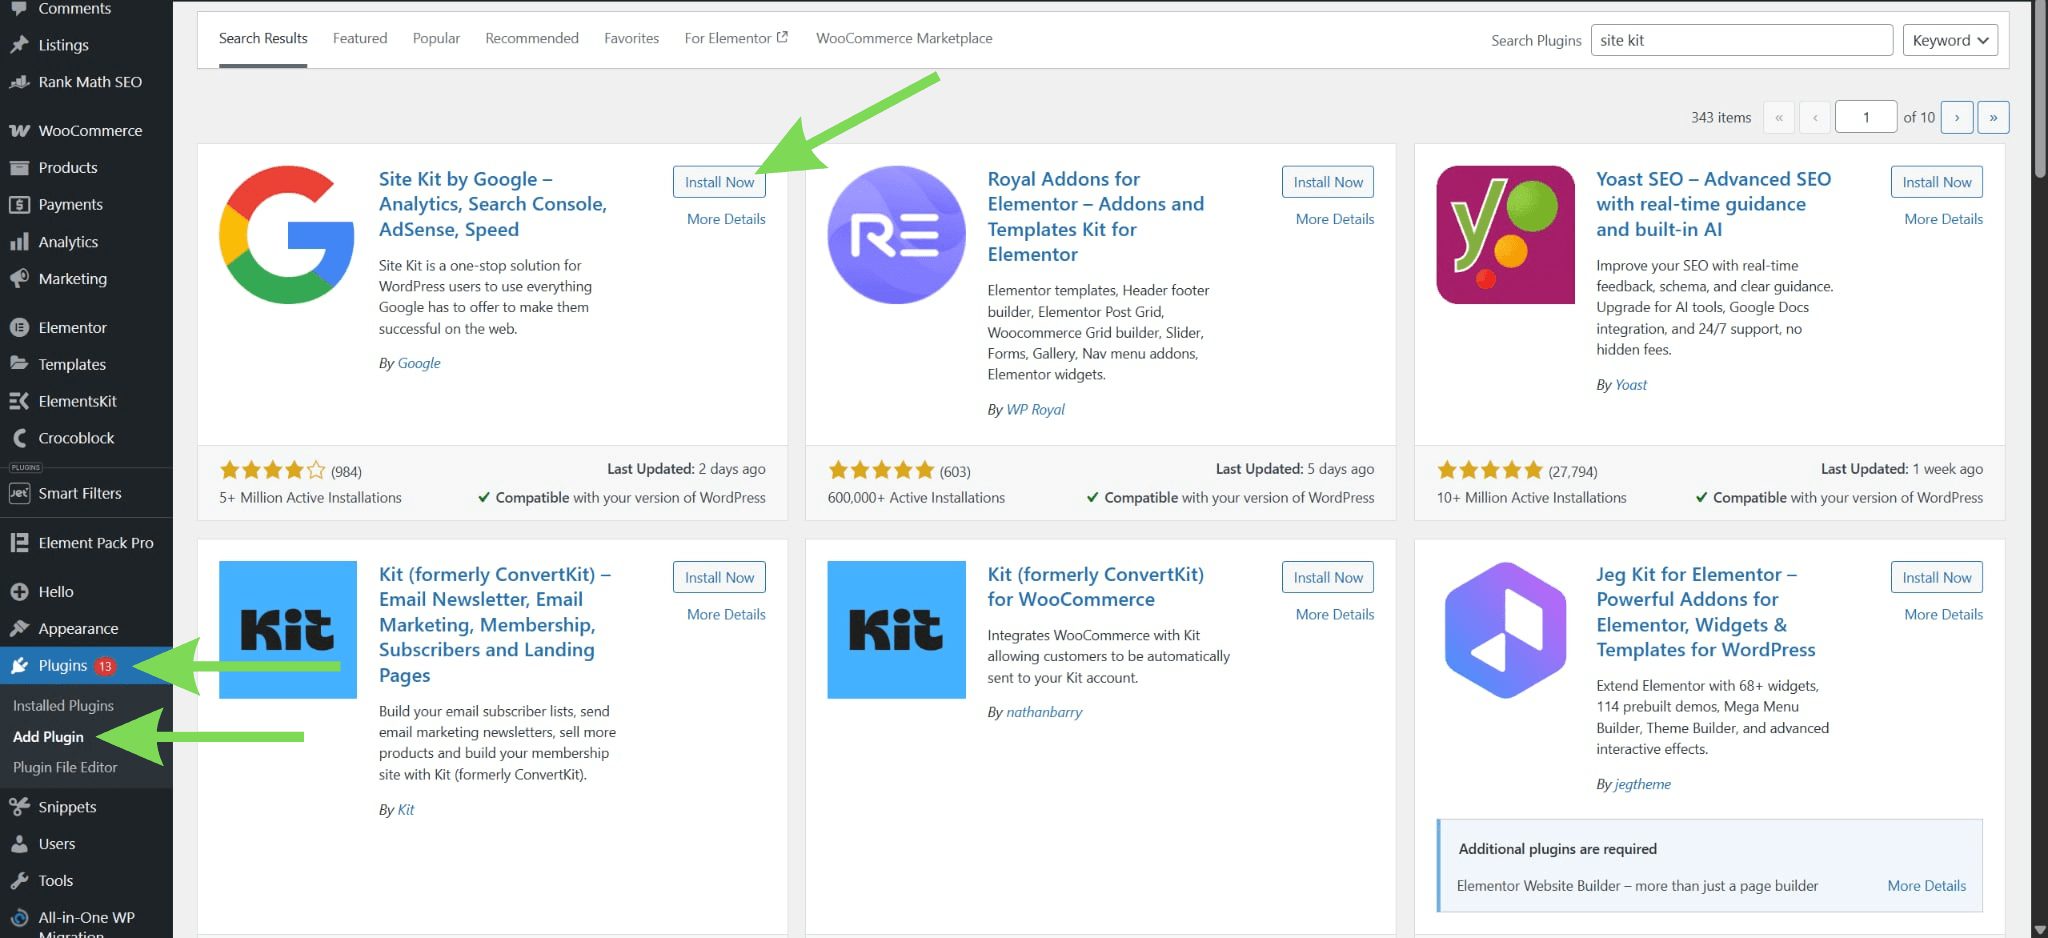
Step 3: Install Site Kit by Google
Go to Plugins and click Add New, then search for Site Kit by Google. Install the plugin and activate it once the installation is complete. This plugin is the official tool for connecting WordPress to AdSense.
It removes the need for manual coding and simplifies the process. Using Site Kit ensures the code is placed correctly. It also reduces the chance of setup errors. This is why most tutorials recommend this method.
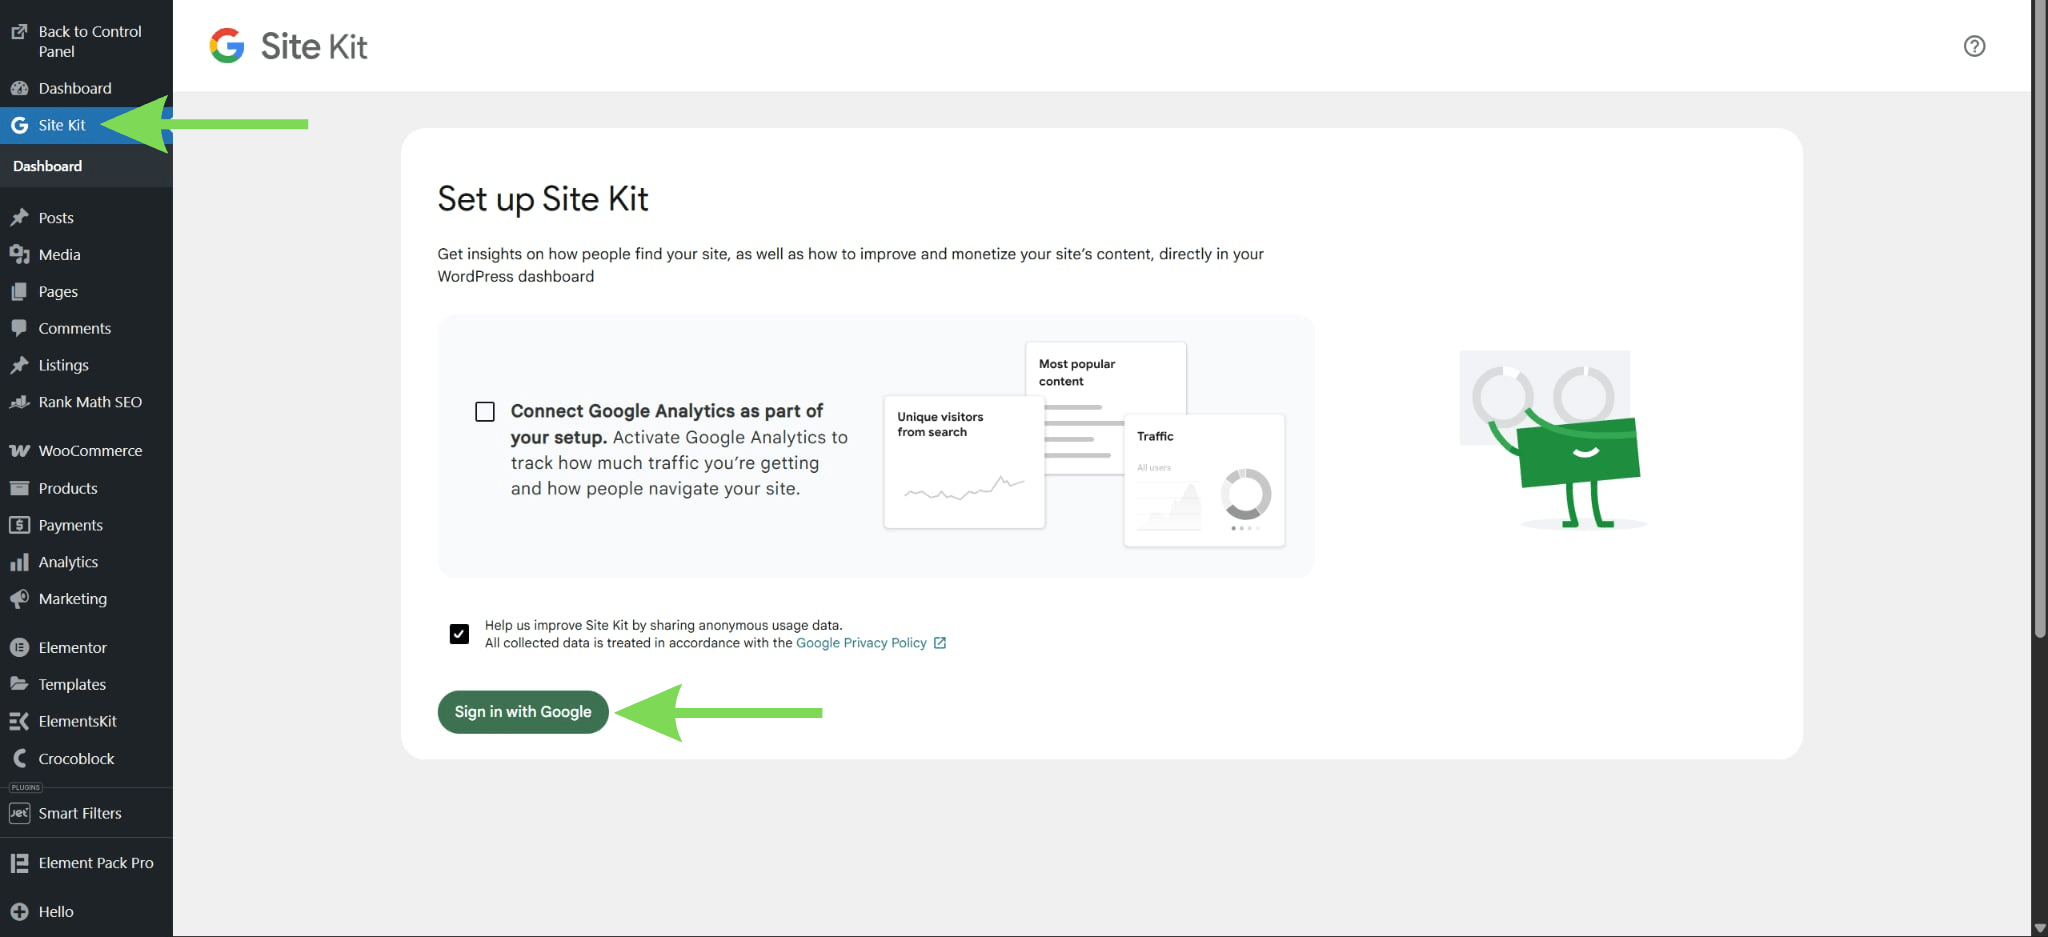
Step 4: Start setup and connect your Google account
After activating the plugin, click Start Setup inside Site Kit. Sign in using the same Google account connected to your AdSense. Grant all permissions requested during the setup process. This allows Site Kit to access and manage your services.
Using the correct account is important to avoid connection issues. Once connected, your site will begin syncing with Google services. This step links everything together.
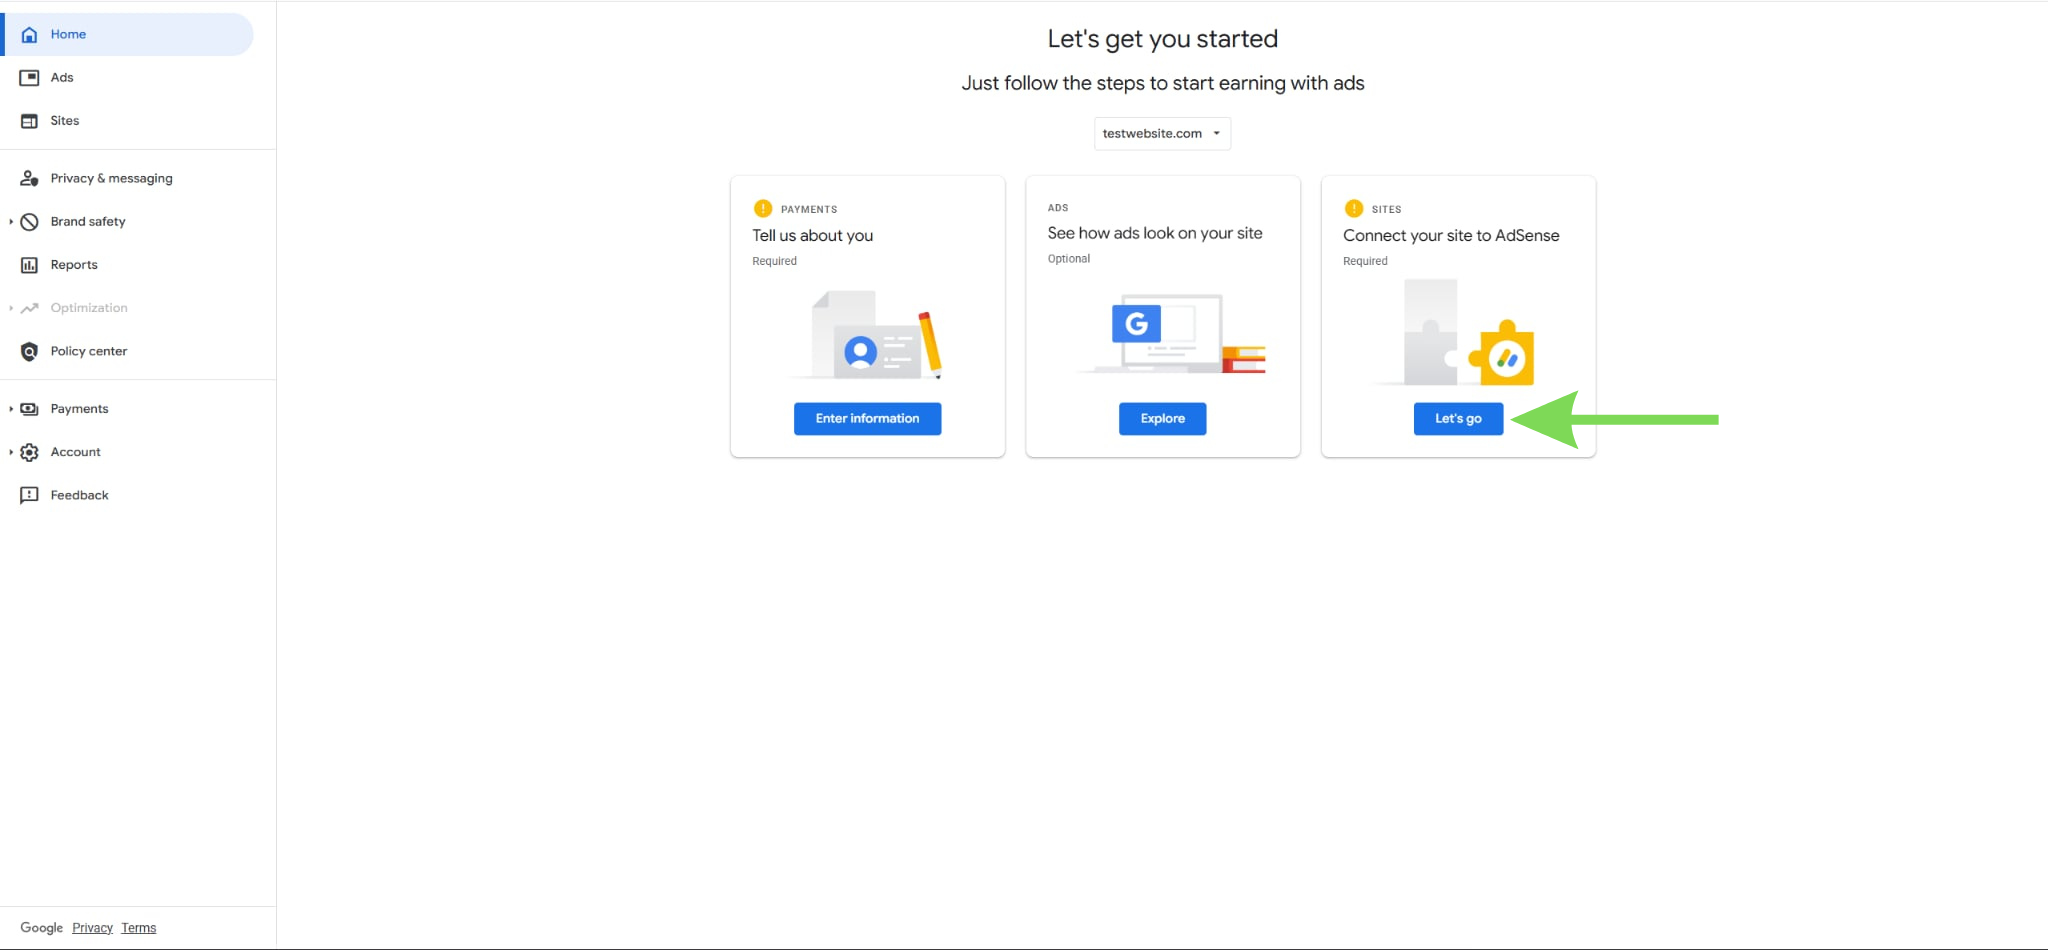
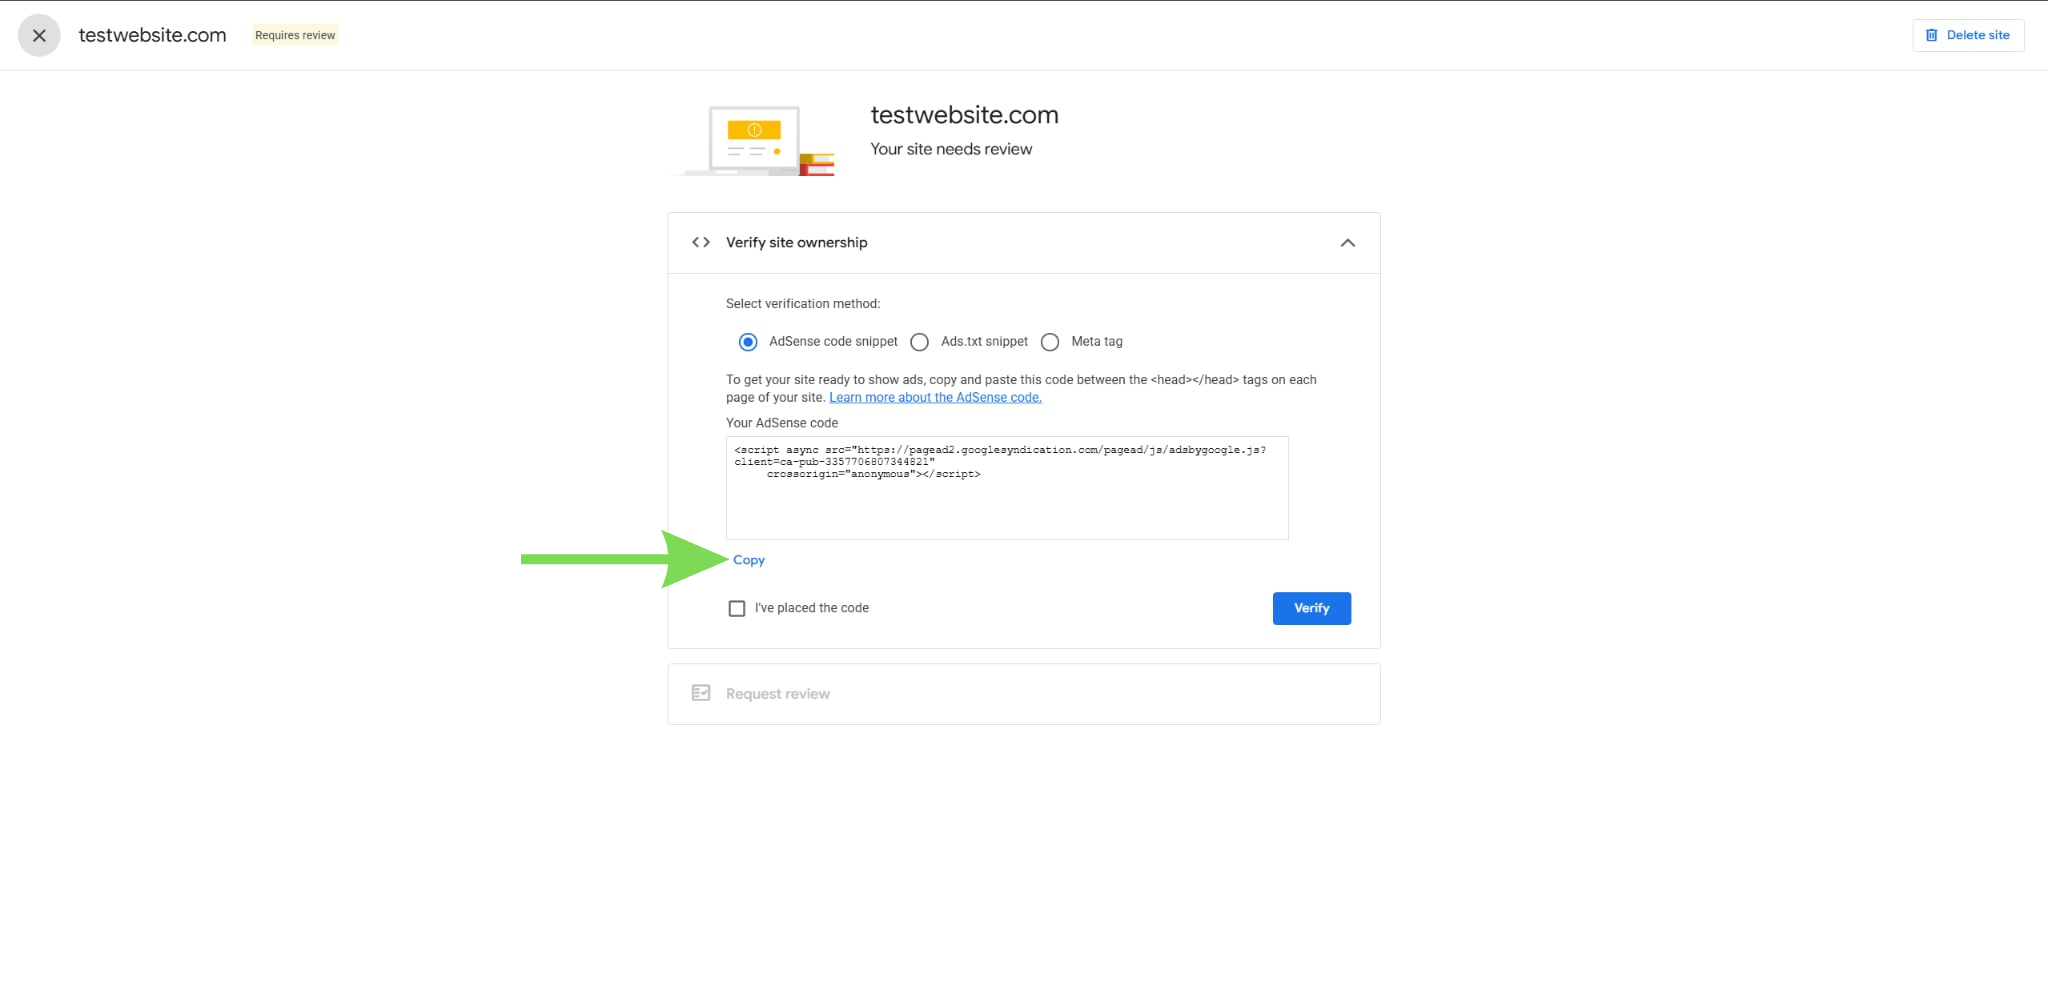
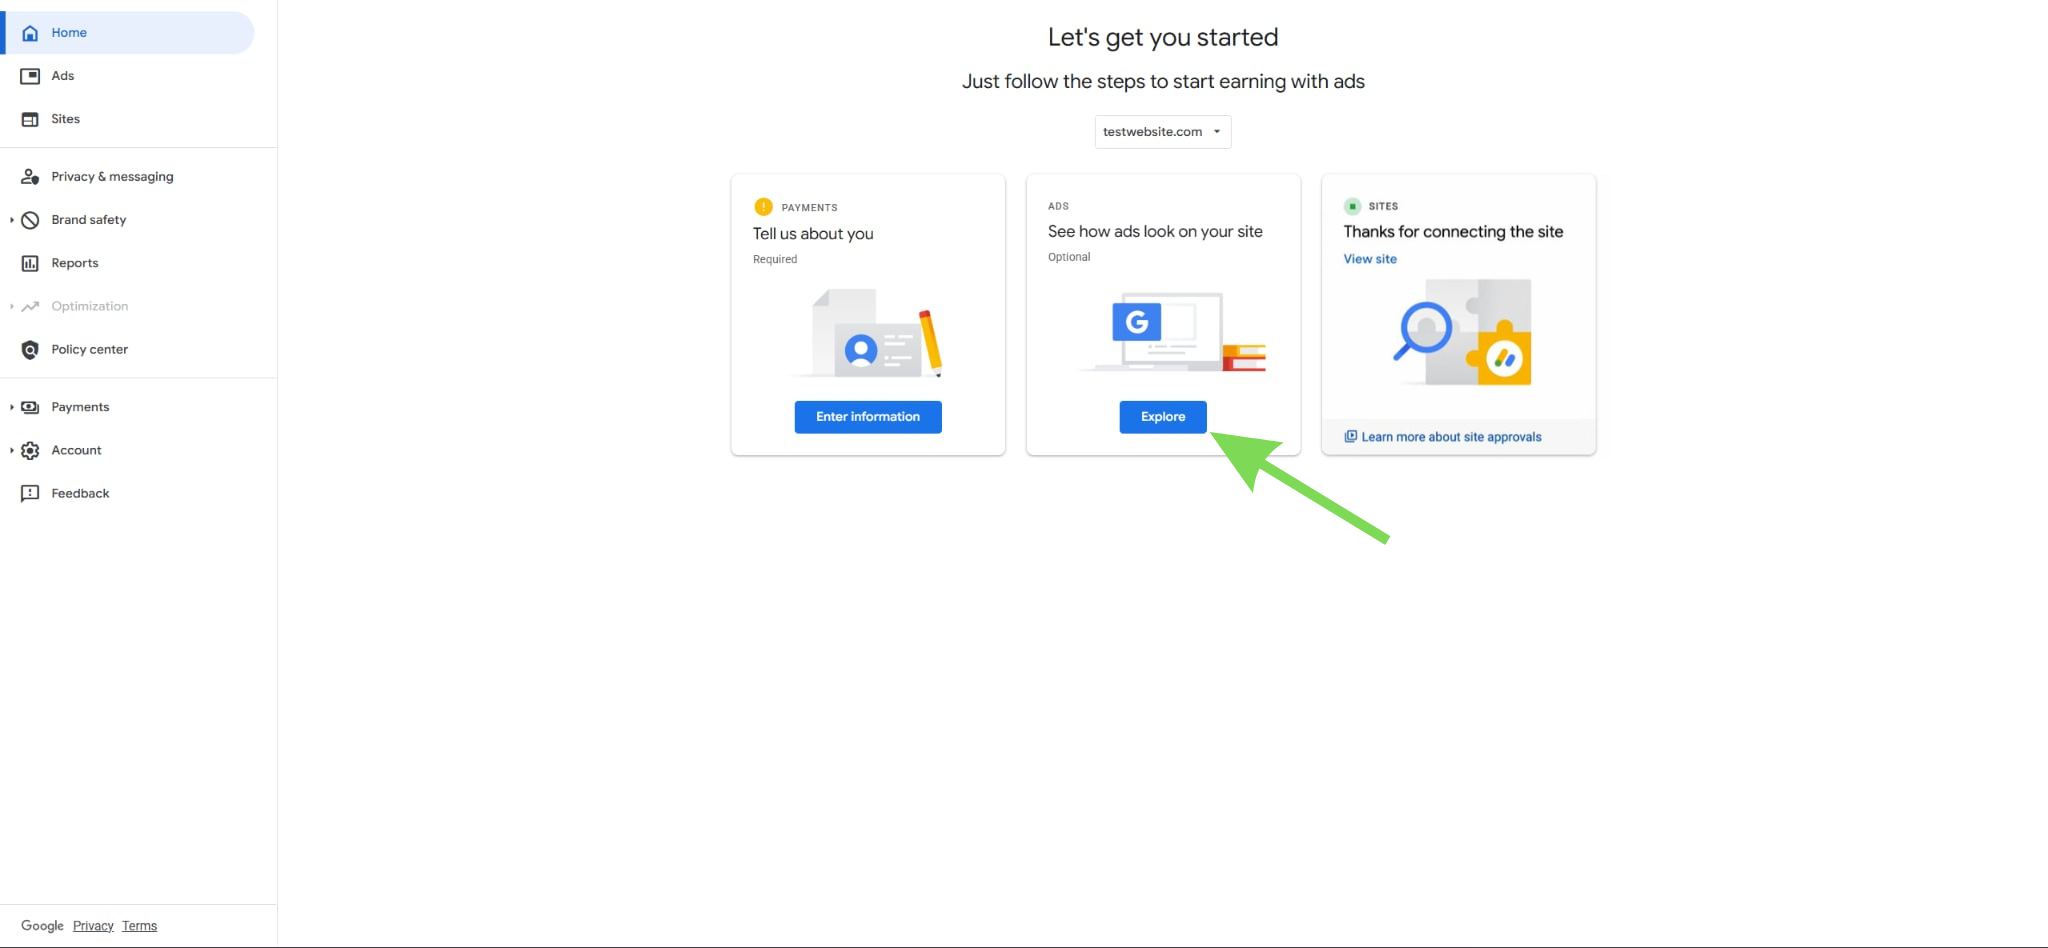
Step 5: Get your AdSense code snippet
After signing in, return to your AdSense account and select Connect AdSense. You will see several verification options, but the code snippet is the most direct to use.
Choose the AdSense code snippet option and copy the full code exactly as provided. This snippet is what links your site to AdSense. Make sure you do not modify any part of the code before placing it.
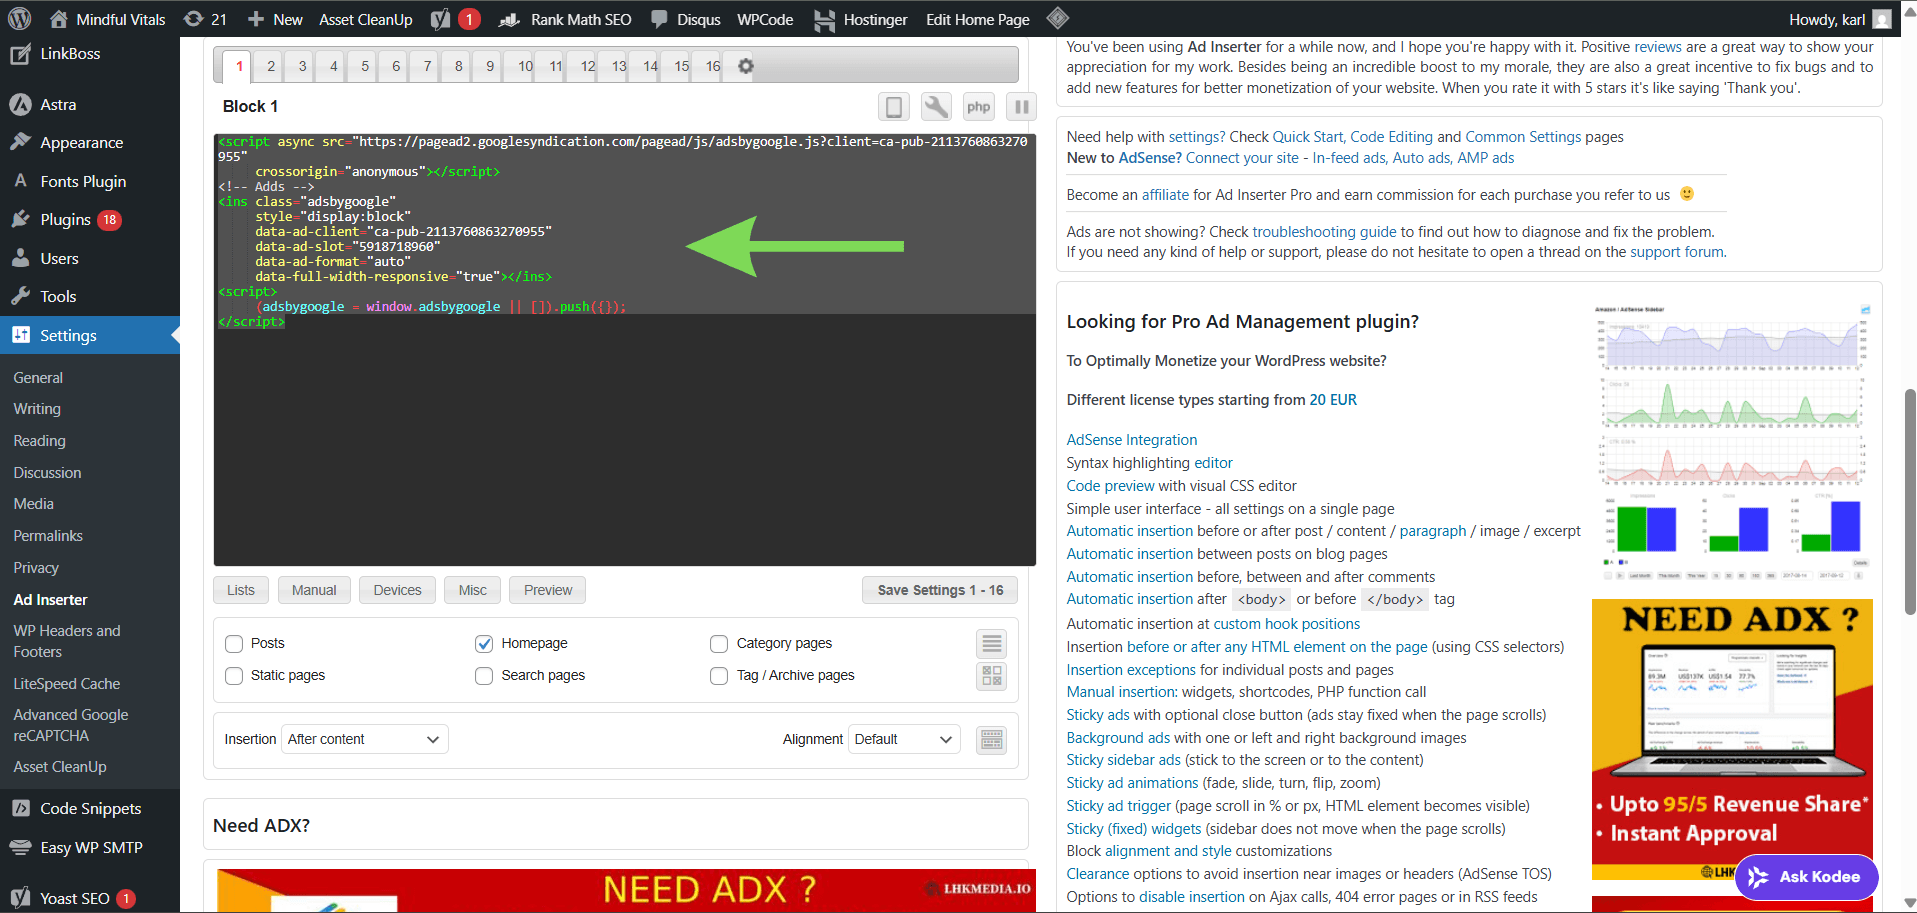
Step 6: Three Ways to Insert AdSense Code in Your WordPress Website
There are multiple ways to add AdSense code to your WordPress site. You can choose the method that best fits your setup and technical comfort level.
Using a Header/Footer Plugin
If you want the AdSense code to run site-wide without editing theme files, a header/footer plugin is an easy solution. Plugins like Insert Headers and Footers or other code manager tools let you paste your AdSense snippet once, and it automatically appears on every page.
How it works: Install the plugin, navigate to its header section, paste your AdSense code, and save. The code will now run across your entire site without manual edits.
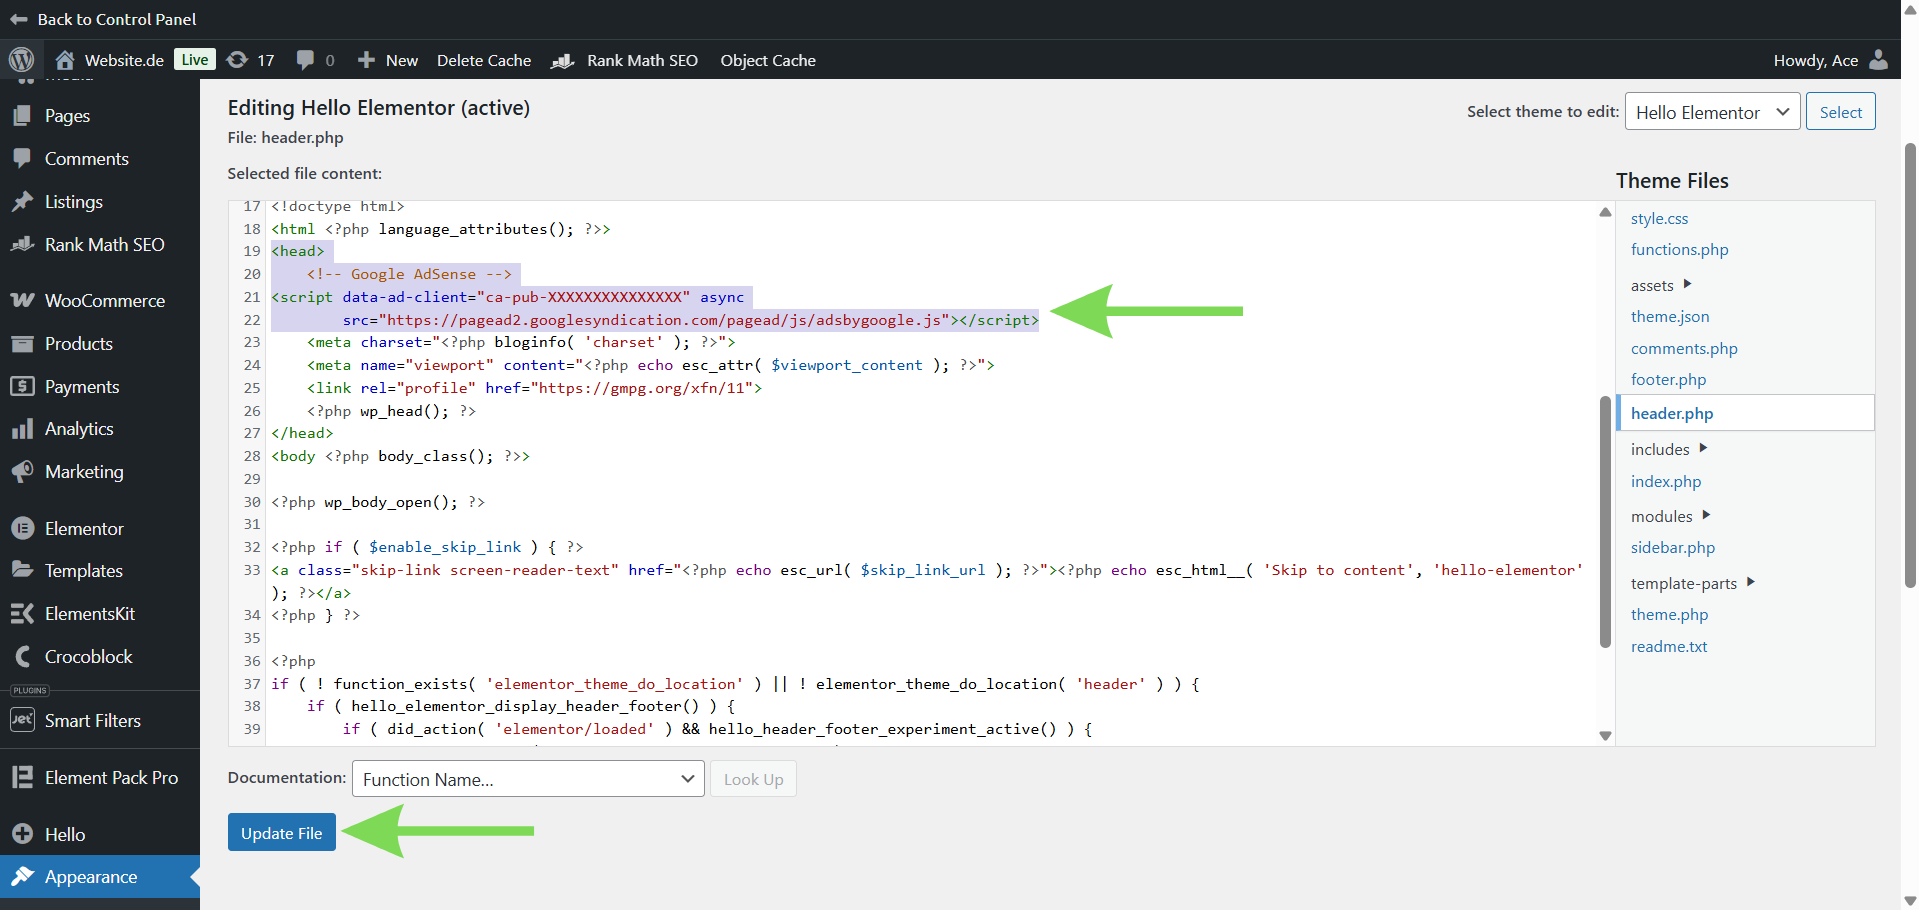
Adding the Code Directly in Your Theme (header.php)
For users comfortable editing WordPress theme files, you can insert the AdSense code directly into your theme’s header.php file. This method gives full control over placement and ensures the code loads across the site.
How it works: Open the header.php file in the theme editor and paste the AdSense code just before the closing </head> tag. Using a child theme is recommended so your changes won’t be overwritten during theme updates.
Add the AdSense Code in Elementor
If you’re using Elementor, the most reliable way to integrate Google AdSense is by adding the code site-wide. This ensures ads are loaded across your entire website without needing to place code manually on individual pages.
With Elementor Pro, you can insert your AdSense script globally using the Custom Code feature.
How it works: Go to Elementor > Custom Code, then click Add New. Paste your AdSense code into the editor and set the location to the <head> section.
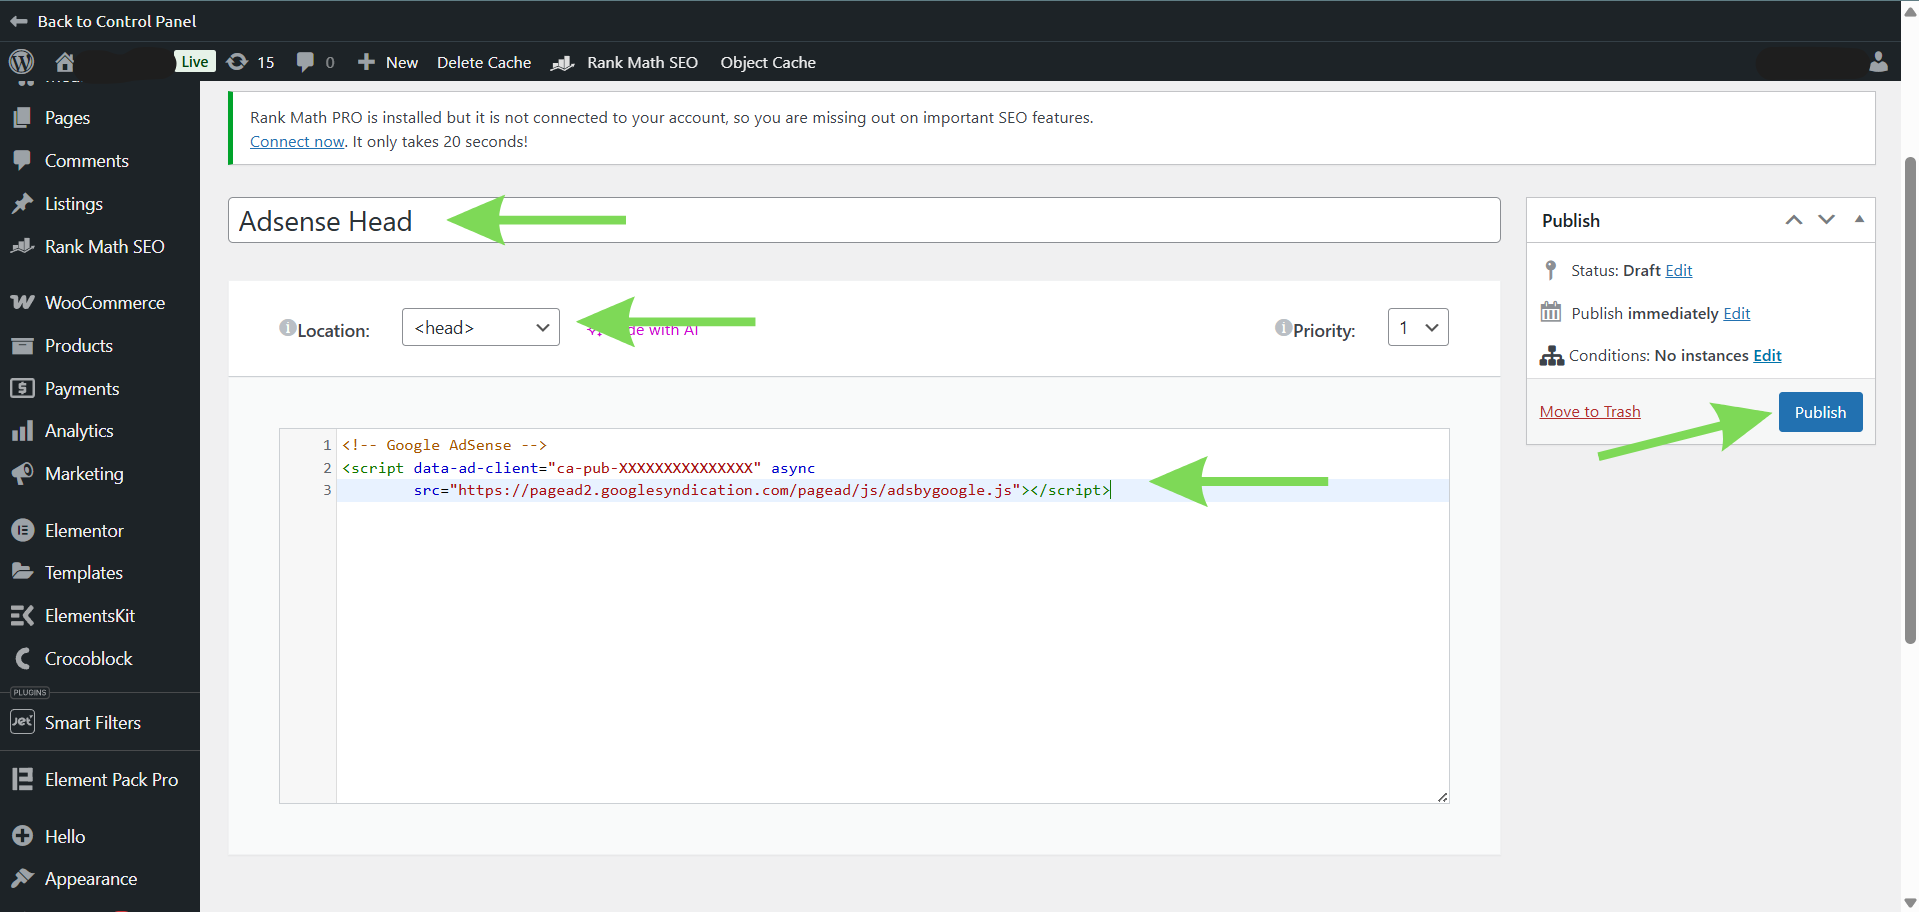
Next, click Publish. After publishing, Elementor will prompt you to set the display conditions. This is where you choose Entire Site so the code runs on all pages of your website.
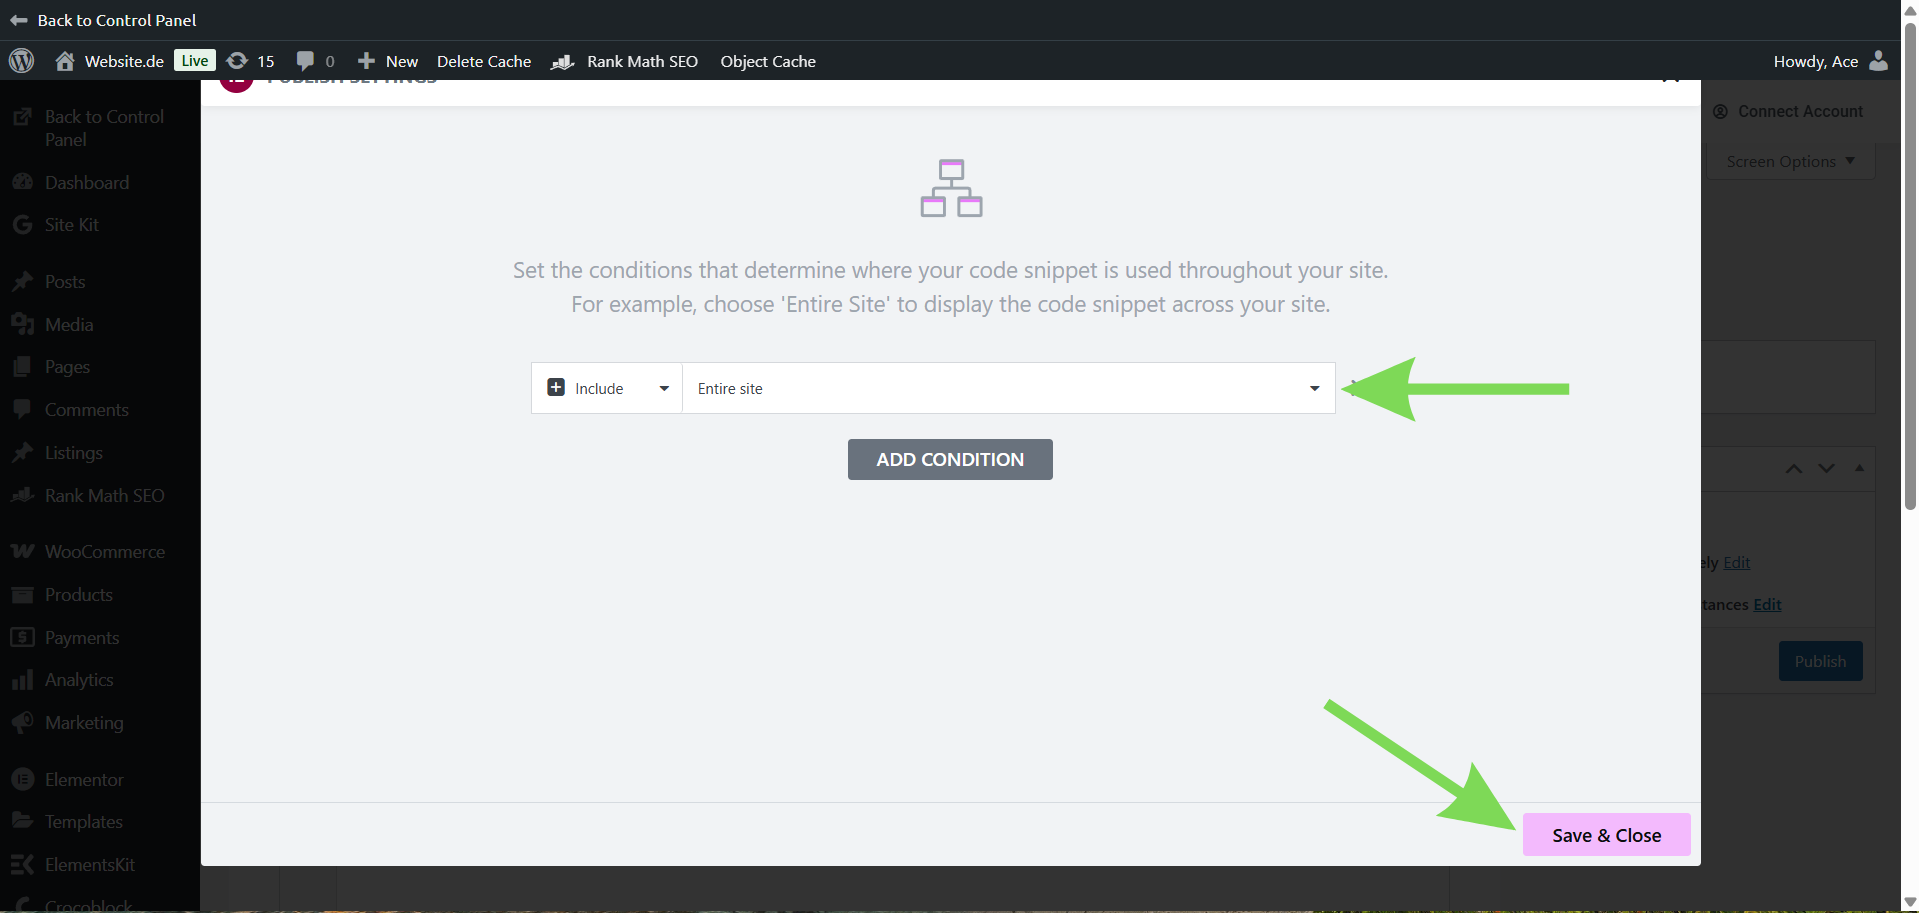
Once saved, your AdSense script will be active across the whole site, allowing ads to load properly everywhere.
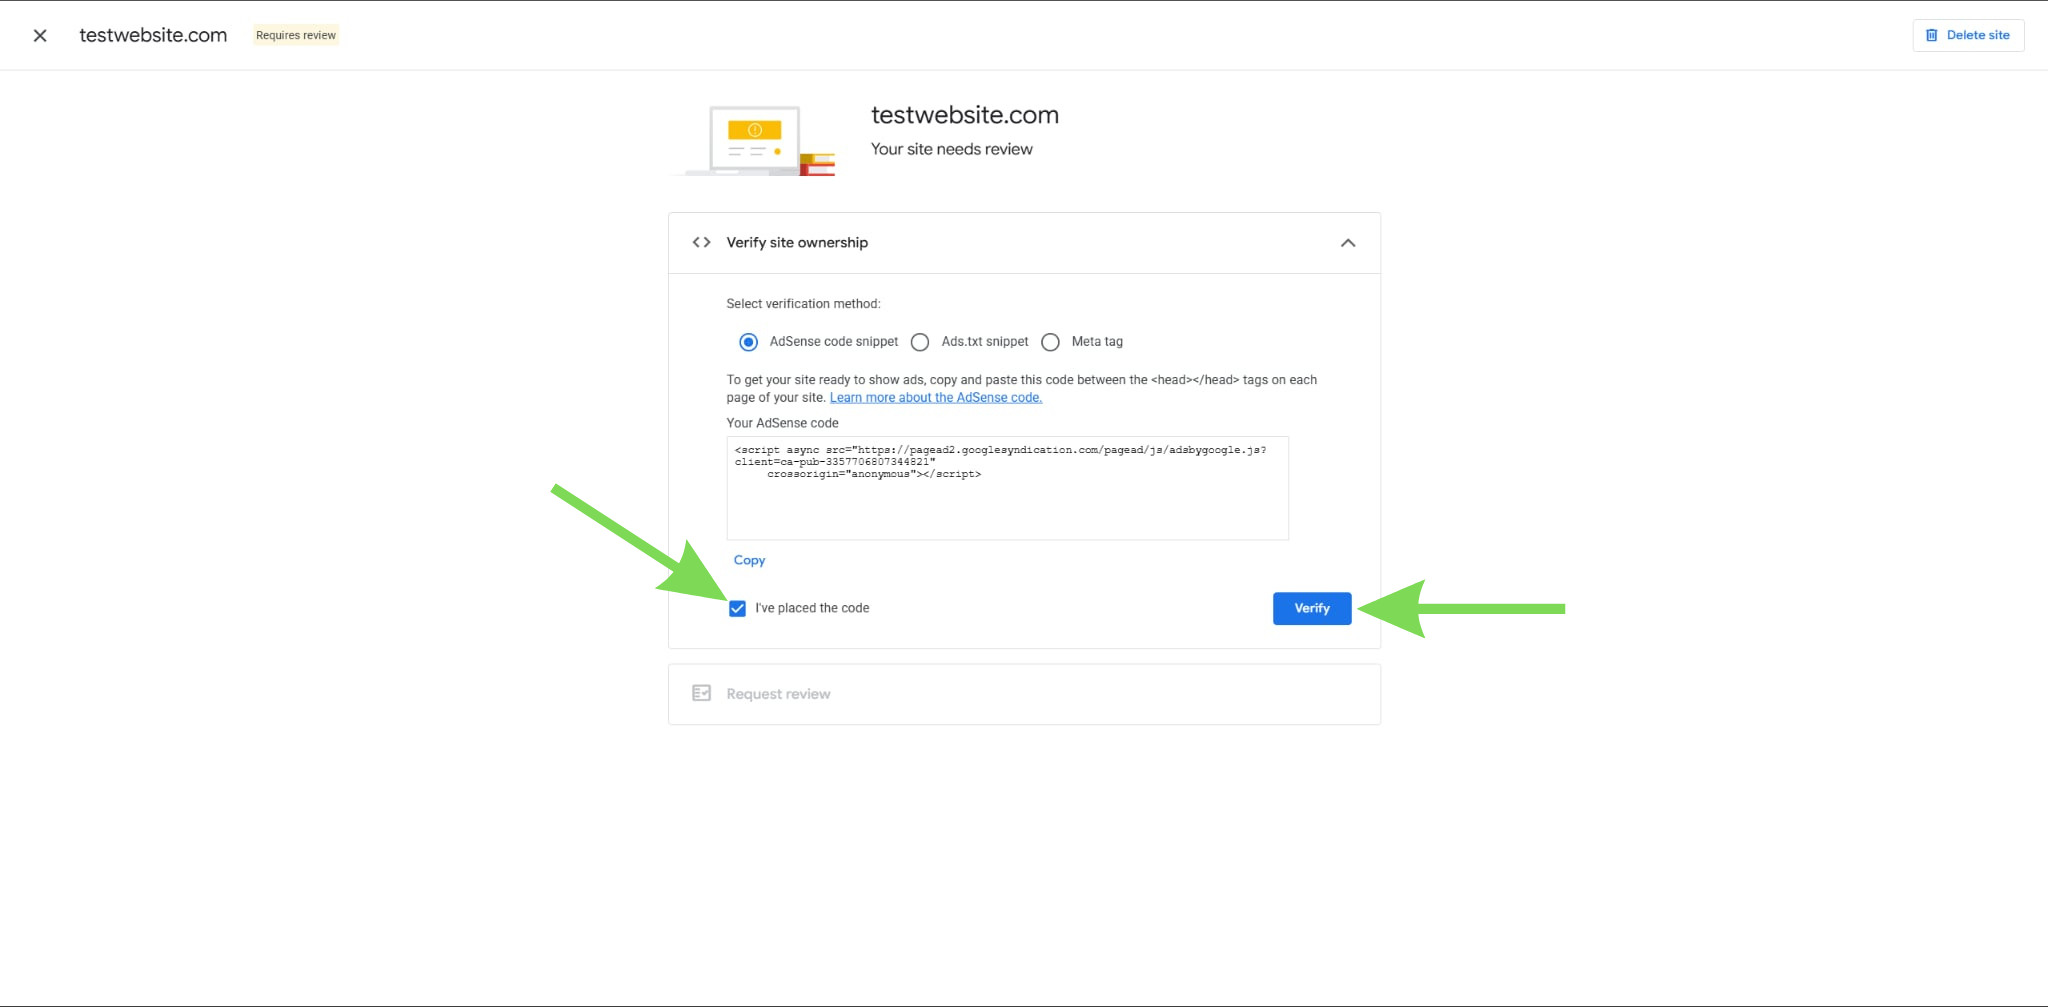
Step 7: Confirm AdSense Code
After connecting AdSense, go back to your AdSense account and click the "I’ve placed the code" option to confirm the connection. This step tells AdSense that your site is ready and allows the setup process to continue.
Using this approach keeps everything simple while ensuring your ads are placed correctly. You can always adjust placements later if you want more control.
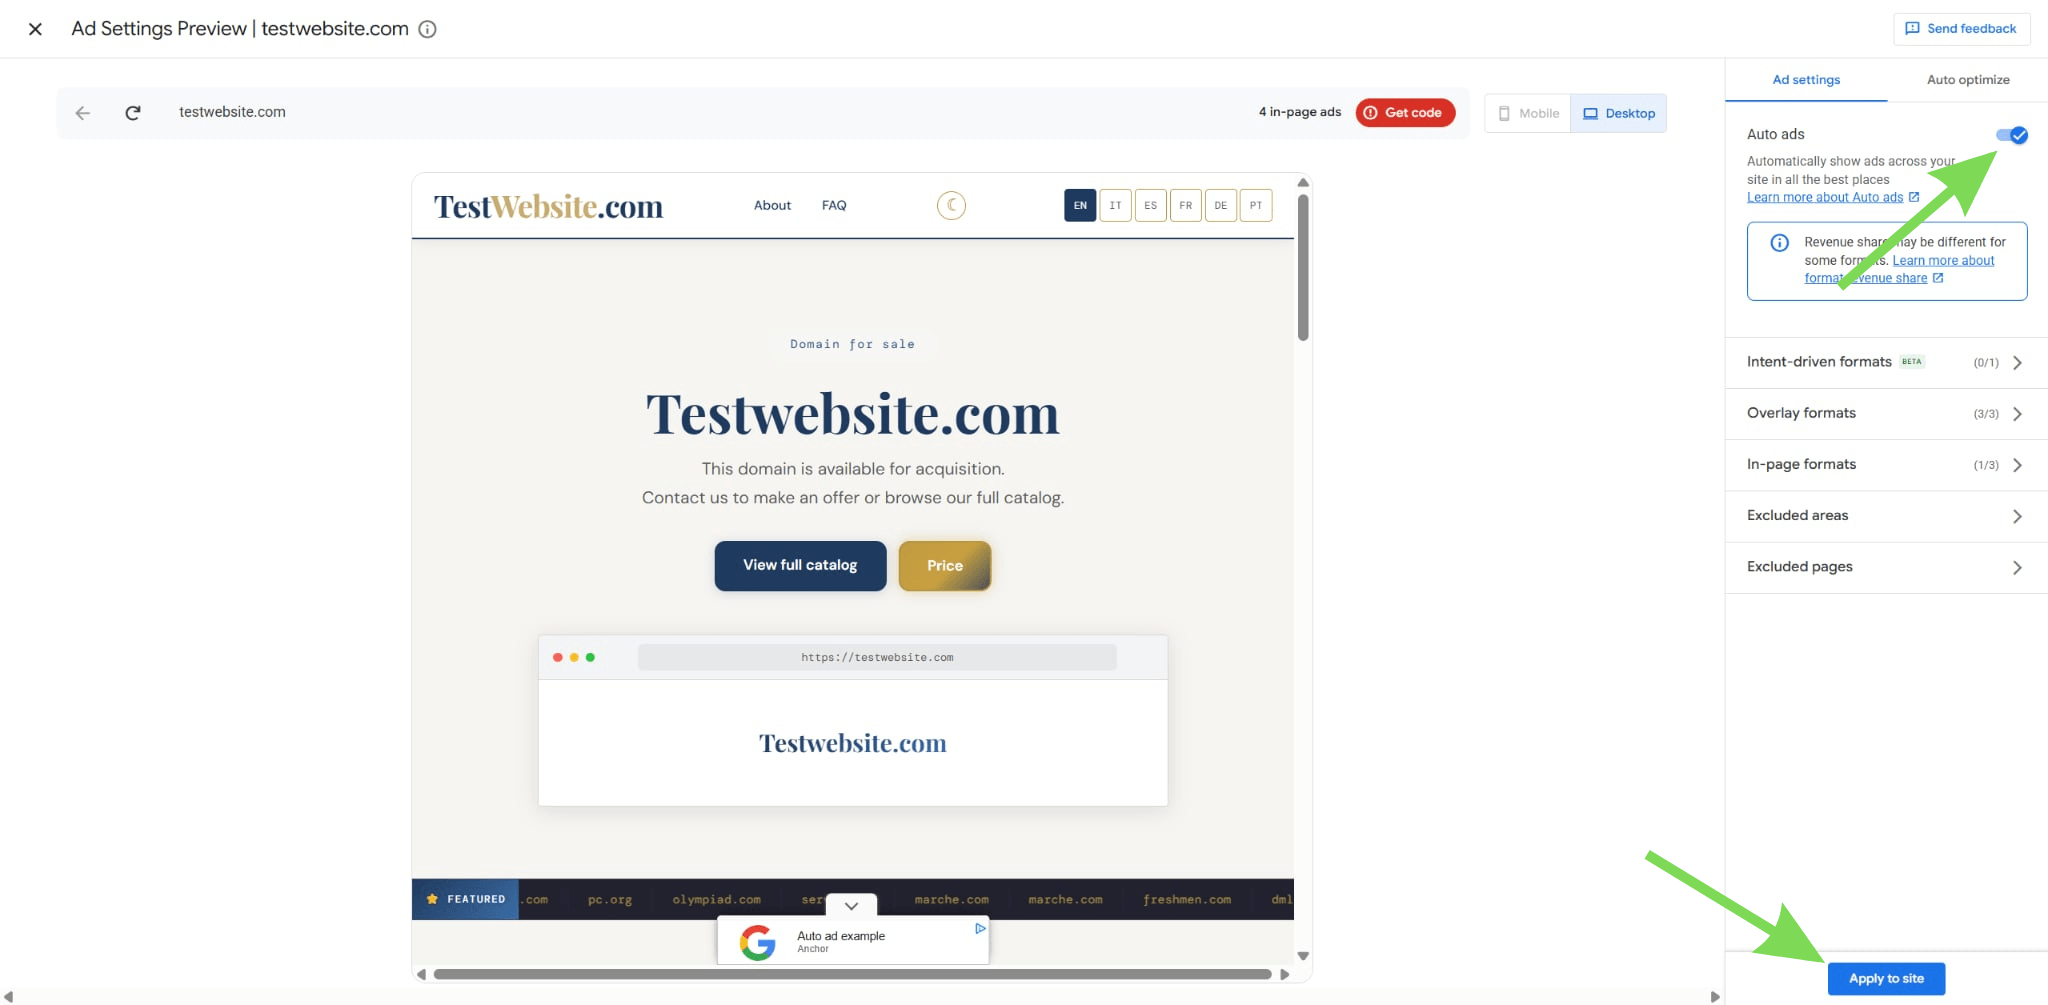
Step 8: Let Google place ads automatically
Enable Auto ads if the option appears, so Google can place ads automatically across your site. The system adjusts placements based on your layout and content, reducing the need for manual positioning and helping optimize performance.
Once enabled, give the system time to process ads, which may not appear immediately and can take several hours or up to a day to show. You can check your AdSense account for status and refresh your site, but avoid making repeated changes during this period.
Step 9: Fix issues if ads are not appearing
If ads are not showing after some time, review your setup. Make sure you used the correct Google account during connection. Check that your site is approved and publicly accessible. Avoid adding code manually if Site Kit is already installed.
Duplicate setups can cause conflicts. Clearing your cache can also help refresh your site. Most issues can be resolved by carefully reviewing these steps.
Maintain your AdSense setup
Regularly check your AdSense integration to make sure everything continues to run smoothly over time. Even small changes, such as theme updates or plugin installations, can affect how your code loads and how ads are displayed.
It is a good practice to review your setup after making any changes to your website. This helps you catch issues early before they impact your ad performance. You can also monitor your AdSense dashboard to confirm that ads are still serving correctly.
Keeping your setup updated ensures your ads remain visible, your layout stays consistent, and your site continues to perform without interruptions.
Conclusion
Adding AdSense code in WordPress is an important step in turning your website into a consistent source of revenue. By following the correct setup process, from connecting your account to properly placing the code, you ensure that your ads display reliably and perform as expected.
At Jump.bg, we understand that a successful AdSense setup also depends on a stable and optimized hosting environment. Our WordPress hosting is built to support consistent performance, helping your ads load smoothly across your site. If you need assistance with your setup or want a hosting solution that supports reliable monetization, you can contact us anytime at support@jump.bg.