
JavaScript lets you add functionality to WordPress that standard blocks and plugins don't always provide. This could be a calculator, a customized form, an interactive element, or a connection to an external service.
However, you need to add the code correctly. A small script for one page does not need to load across the entire site, while more complex functionality is better managed separately from the content.
WordPress offers several ways to do this. The right choice depends on where the script needs to run, how often it will be used, and how easy it needs to be to maintain.
Key Takeaway:
You can add JavaScript to WordPress in several ways, depending on the task. Custom HTML works well for a small script on a single page; a plugin such as WPCode can simplify code management, while more complex or reusable functionality is better loaded from a separate JavaScript file.
How JavaScript Works in WordPress
JavaScript adds interactivity to a page. It can make a button respond to a click, update a calculator without reloading the page, show or hide content, or validate data entered into a form.
In WordPress, you can add code directly to a specific page or load it from a separate file. The first option is convenient for small, page-specific functionality, while the second suits scripts used in multiple places or that require easier maintenance.
It is also important to load code only where you need it. This avoids unnecessary overhead on other pages and keeps script management more organized.
Which Method Should You Use?
The choice mainly depends on the scope of the functionality and how you want to manage the code. Here are the three most practical options:
Using the Custom HTML Block
For a small script that is needed on only one page, the Custom HTML block is the most direct option. It allows you to add the code without editing theme files.
The JavaScript panel is available to users with the unfiltered_html capability. If this capability is not available, WordPress may filter part of the code, and the panel may not be accessible.
To add the script:
- Open the page in the WordPress editor.
- Add a Custom HTML block through the Block Inserter.
- Open the block's code editor.
- Select the JavaScript panel and paste in the script.
- Save or update the page.
- Open the published page and check whether the functionality works.
For example, you can add a button that changes text when clicked:
<button id="show-message">Click me</button>
<p id="message"></p>
The code for this interaction could be:
const button = document.getElementById('show-message');
const message = document.getElementById('message');
button.addEventListener('click', () => {
message.textContent = 'The button works!';
});
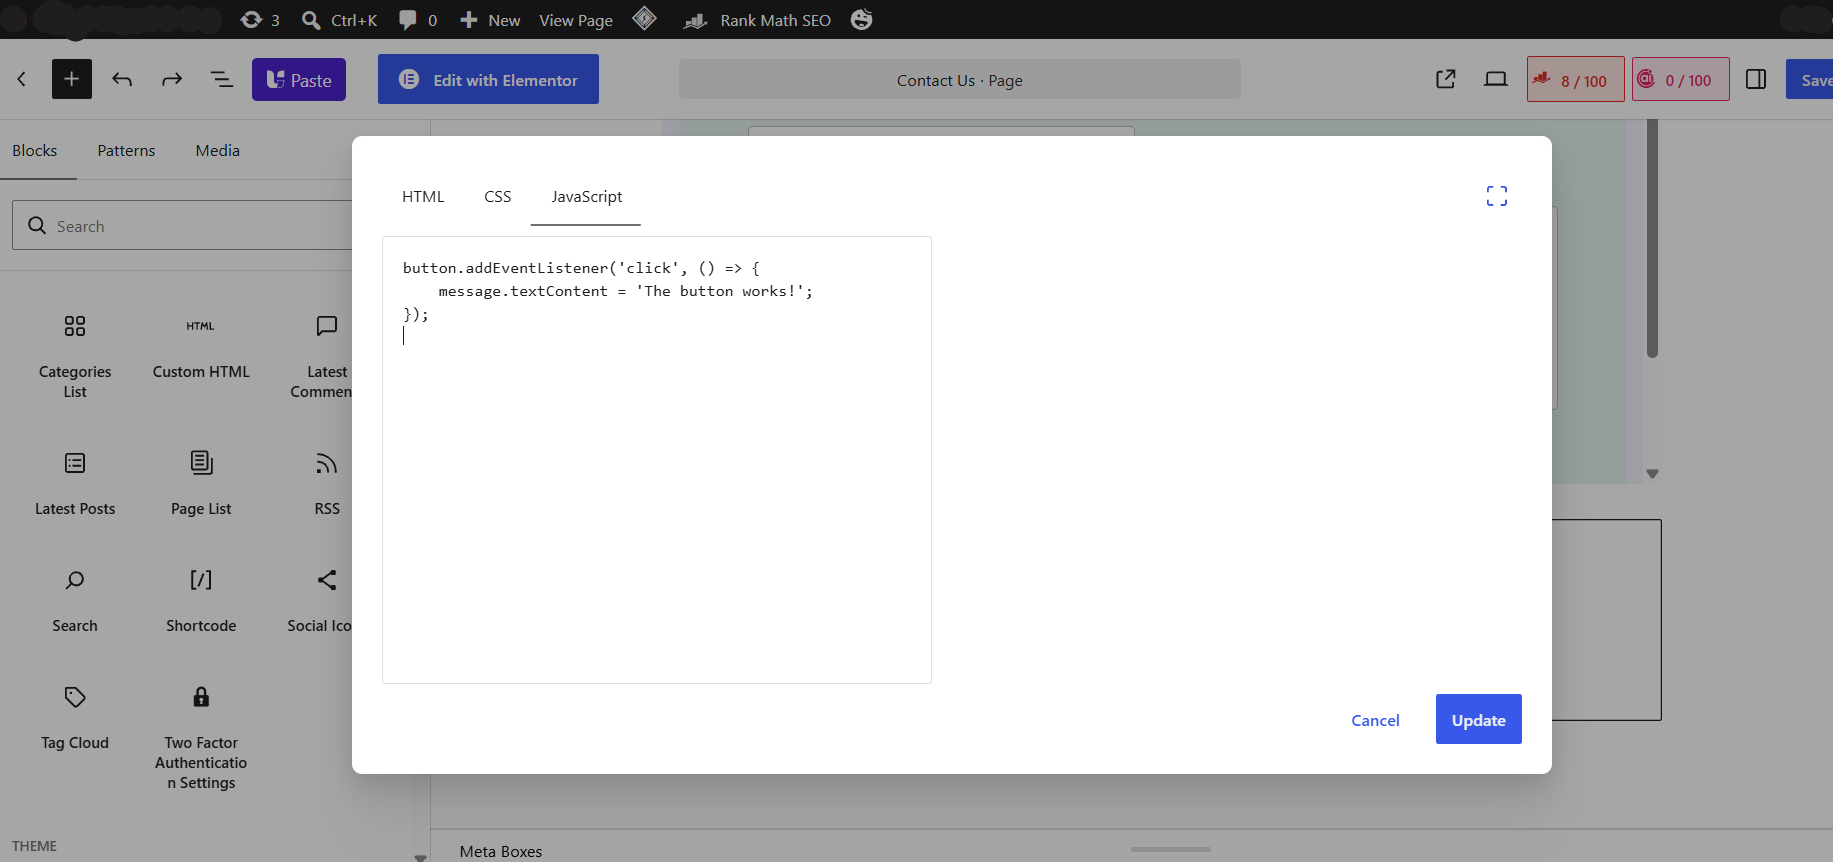
The first two lines find the button and the text field on the page. The event listener then waits for a click and changes the paragraph content.
This method is convenient for small, self-contained functionality. If you need to use the same code on several pages, manage it through a snippet or a separate JavaScript file.
Using a Code Snippets Plugin
A code snippets plugin is a convenient option when you want to manage custom code directly from the WordPress admin area without adding it to the page content or editing theme files.
This approach is especially useful if you want an easier way to enable, disable, and organize individual scripts. The exact settings depend on the plugin you use, but the general process is usually as follows:
- Choose a reliable plugin that supports JavaScript, such as WPCode or Woody Code Snippets.
- Create a new JavaScript snippet.
- Paste the required code into the editor.
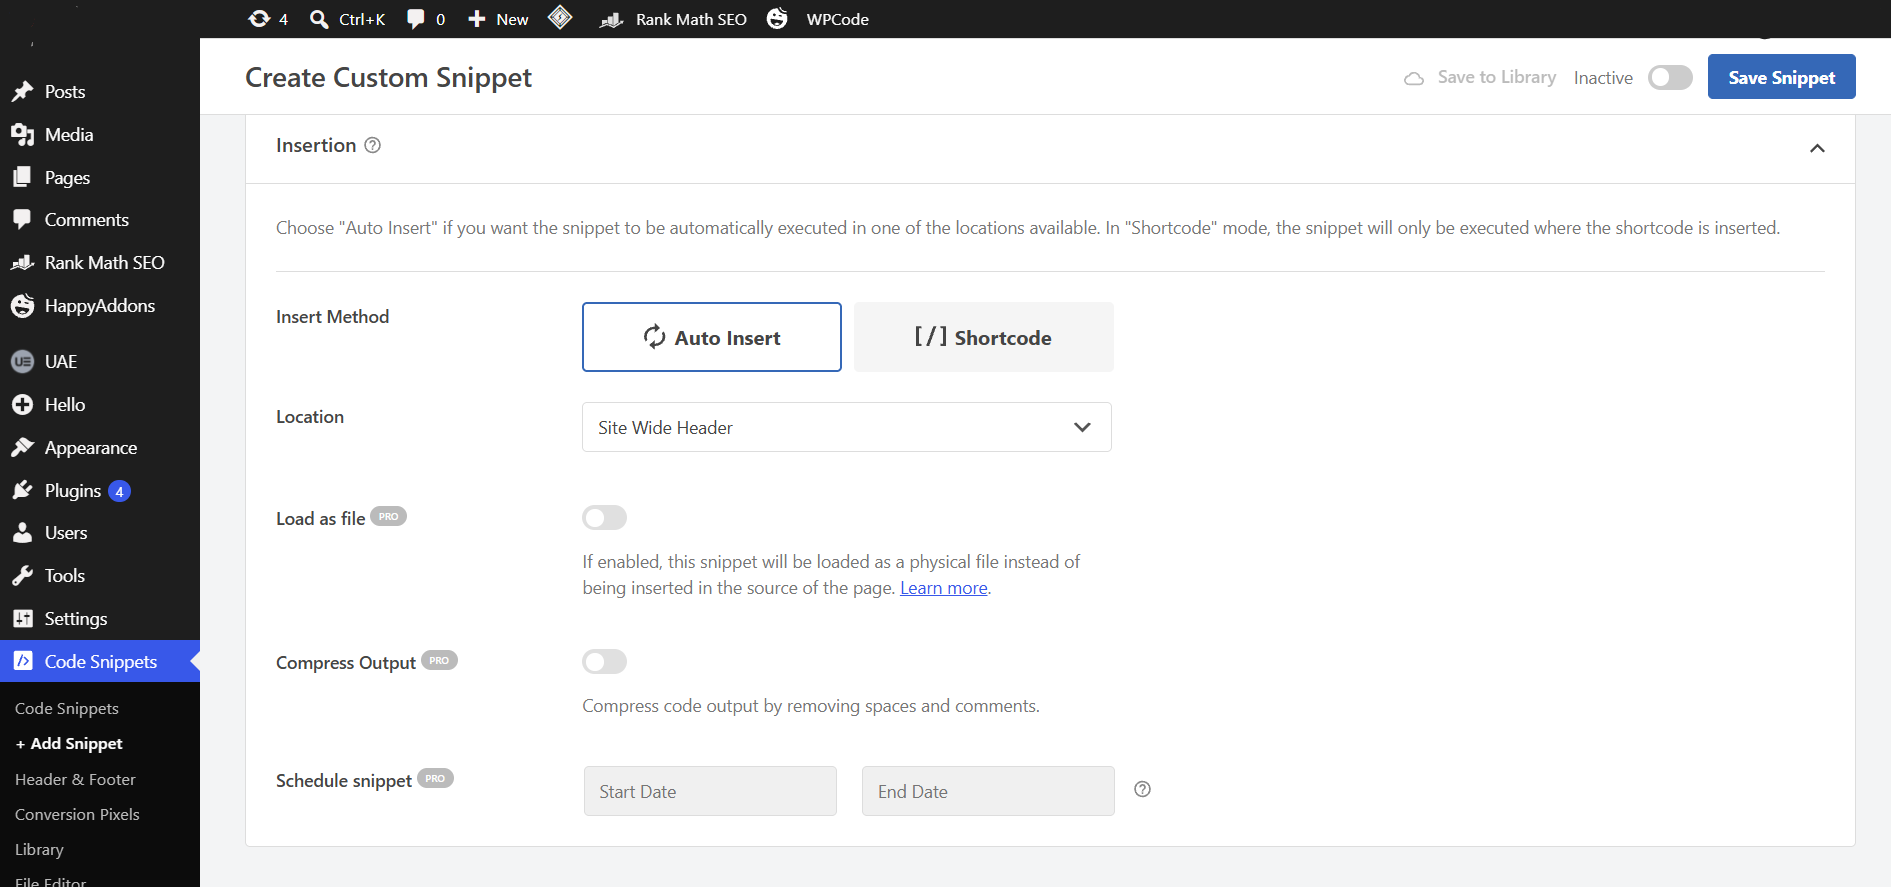
- Specify where the script should run if the plugin provides rules based on page, location, or other conditions.
- Save and activate the snippet.
- Open the relevant page and check whether the functionality works.
For example, the same button interaction can be added as a JavaScript snippet:
const button = document.getElementById('show-message');
const message = document.getElementById('message');
if (button && message) {
button.addEventListener('click', () => {
message.textContent = 'The button works!';
});
}
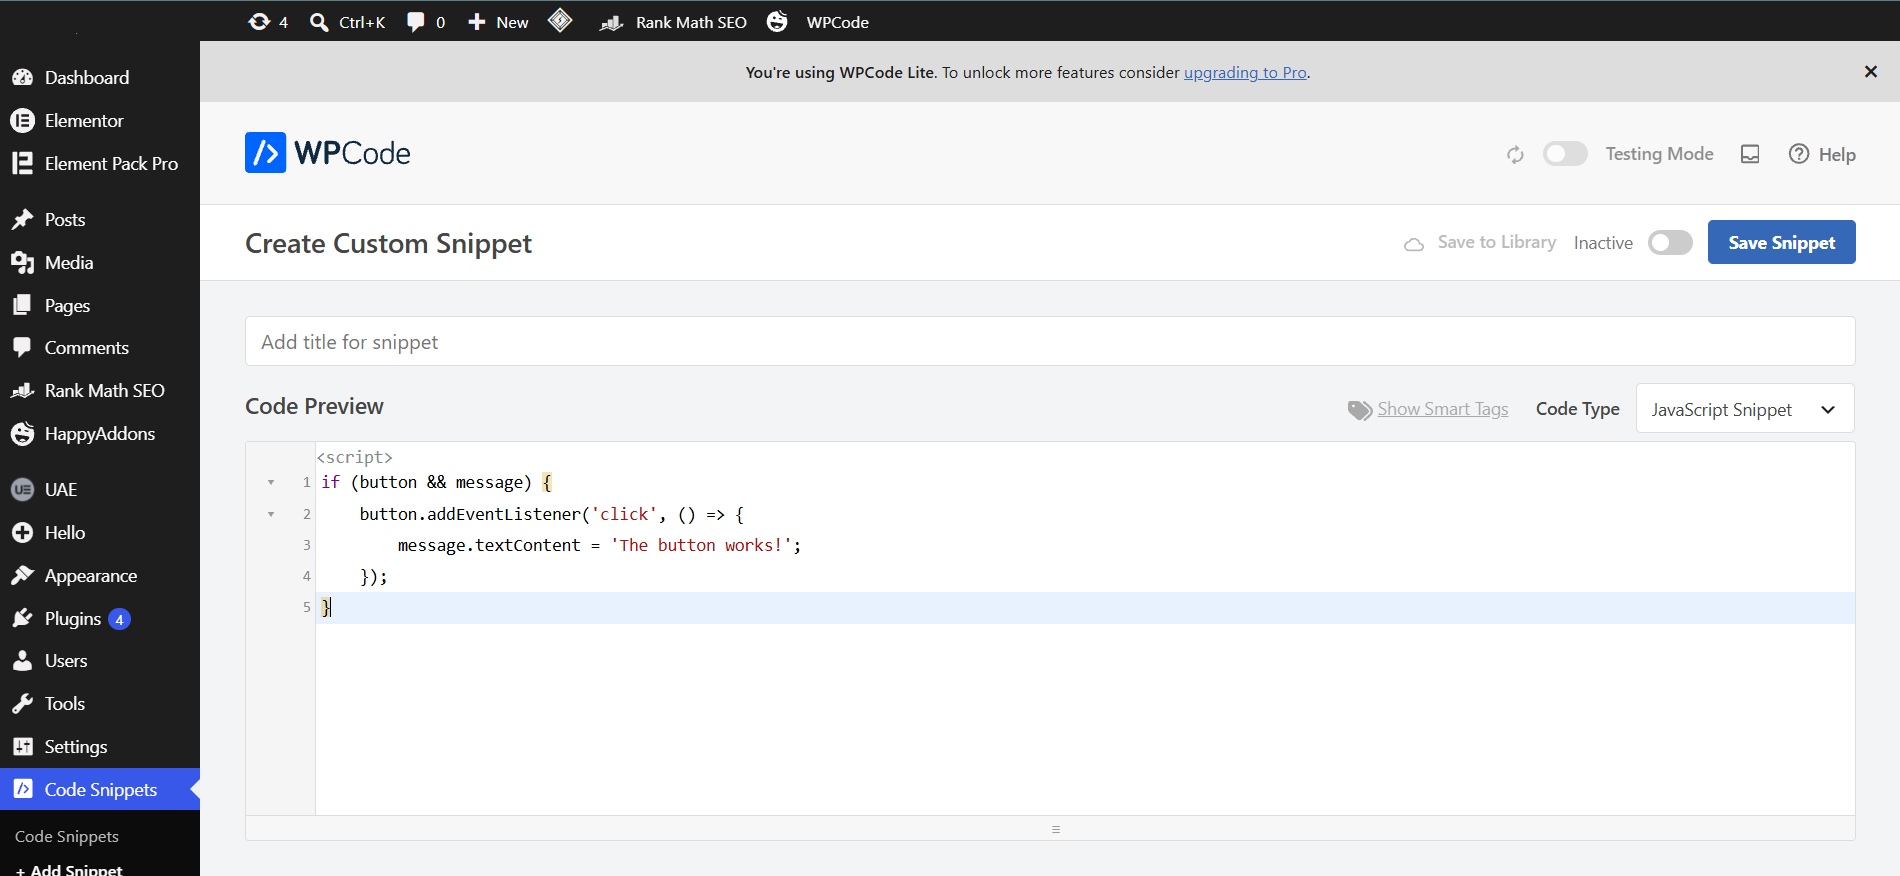
The if (button && message) check ensures that the code runs only when the required elements exist on the page. This prevents an error from occurring when addEventListener() is called on a missing element.
A plugin is a good choice when you want to keep custom code separate from the content and manage it conveniently from the admin area. However, if the script is larger, used in many places, or part of more complex functionality, a separate JavaScript file is usually the better solution.
Loading an External File With wp_enqueue_script()
When a script appears in multiple places or supports more complex functionality, store it in a separate .js file. This makes the code easier to maintain and keeps it separate from the page content.
WordPress provides the wp_enqueue_script() function, which lets you manage the file, its version, dependencies, and loading method.
In practice, you need two things: a JavaScript file with the functionality and a PHP function that tells WordPress when and how to load it. For example, a child theme can contain a js/custom-script.js file and load it like this:
function mytheme_enqueue_custom_script() {
wp_enqueue_script(
'mytheme-custom-script',
get_stylesheet_directory_uri() . '/js/custom-script.js',
array(),
'1.0.0',
array(
'strategy' => 'defer',
)
);
}
add_action( 'wp_enqueue_scripts', 'mytheme_enqueue_custom_script' );
In this example, mytheme-custom-script is the unique script name, and the next parameter points to the file location. The empty array means no dependencies are defined, 1.0.0 is the version, and defer delays execution until the HTML document has been processed.
WordPress also supports async as a loading strategy. The right choice depends on how the specific script needs to run and whether it depends on other resources.
This approach suits developers or sites that use a child theme, a custom theme, or a plugin. For small functionality on a single page, Custom HTML or a snippets plugin is usually easier, but for reusable code, a separate file provides better organization and control.
How to Load a Script on Only One Page
If you need a script only on a specific page, there is no reason to load it across the entire site. WordPress allows you to control this with the conditional is_page() function.
For example, if a calculator uses the calculator.js file and should run only on a page with the slug calculator, the code could look like this:
function mytheme_enqueue_calculator_script() {
if ( is_page( 'calculator' ) ) {
wp_enqueue_script(
'mytheme-calculator',
get_stylesheet_directory_uri() . '/js/calculator.js',
array(),
'1.0.0',
array(
'strategy' => 'defer',
)
);
}
}
add_action( 'wp_enqueue_scripts', 'mytheme_enqueue_calculator_script' );
The is_page( 'calculator' ) condition checks whether that specific page is being opened. If the condition is met, WordPress loads calculator.js. On all other pages, it doesn't add the file.
This keeps the JavaScript in a separate file, while the PHP condition determines where to load it. This is useful for larger scripts needed only on a specific page, so it doesn't add unnecessary overhead elsewhere on the site.
How to Test the Code and Troubleshoot Problems
After adding the script, test the published page as a visitor would. If something doesn't work, the browser's developer tools can quickly show whether the problem is in the code, how the file loads, or the page elements.
- Test the functionality itself: Click the button, submit the form, or perform the action the script is supposed to handle. Do not rely only on the WordPress editor view.
- Check the browser console: Open the developer tools and select Console. JavaScript errors will appear there, including syntax problems or attempts to access non-existent elements.
- Check the selectors: An error like Cannot read properties of null often means the code cannot find the expected HTML element. Check whether the selector matches the page's actual structure.
- Make sure the external file is loading: If you are using a .js file, open the Network panel, reload the page, and check whether the file loads successfully.
- Check where the script loads: If you have configured conditional loading, make sure the code is present on the page where it is needed and is not added where it is unnecessary.
- Test as a regular visitor: Open the page in a private or incognito window. This can help reveal problems related to the active administrator session or cached resources.
These checks are usually enough to determine whether the problem is in the JavaScript code itself, how it loads, or the HTML elements it interacts with. Identify the source of the error first instead of changing the code at random.
Conclusion
Custom functionality is useful only if the site remains stable, fast, and easy to maintain. The more interactive elements and custom code you add, the more important proper configuration, sufficient resources, and a reliable WordPress environment become.
At Jump.bg, our WordPress hosting provides an environment designed for reliable and fast WordPress performance, including sites that use custom functionality and interactive elements. The service includes caching, increased CPU and RAM resources, and daily remote backups. This lets businesses focus on their website and customers instead of dealing with hosting issues.
If you need help choosing the right WordPress hosting for your website, contact our team at 02 428 8888 or support@jump.bg.